Guidance on Database creation, Archiving, and Login Domain changes
Guidance on creating new databases, archiving existing databases and changing the Login Domain for a database.
Workbooks is supplied with one Database for your account, but if you want to create more (for example a training database), you can add others up to a maximum of 5, subject to your storage limits. Each Database is completely discrete, ie, changes made in one will not affect data in another. Users can be given access to one or more Databases and give them different Capabilities in each one.
Adding a new Database
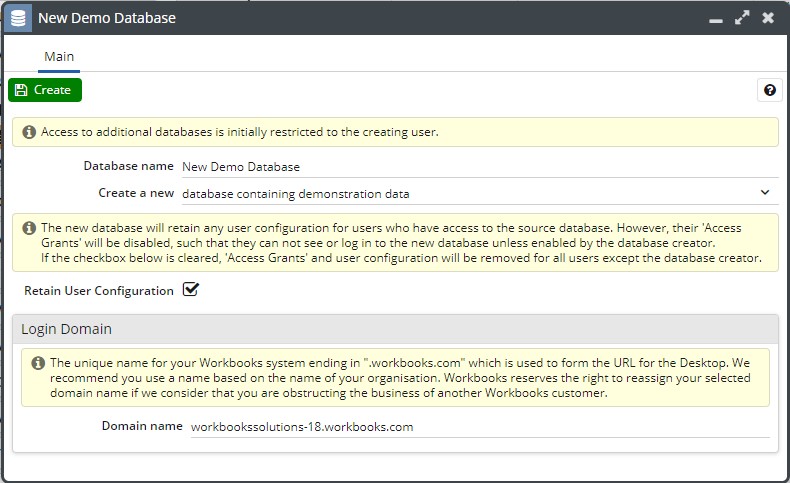
To add a new database click Start > Configuration > Account Settings > Databases> New Database.

- Database Name – What you want the new database to be called.
- Create New – Within the picklist you will see a few options. ‘Database containing demonstration data’, this will create a few demonstration records and configuration, which will now match up to your other database. This is useful for allowing users to learn how to use Workbooks, and for testing configuration changes before applying them to your main database. ‘Empty database’, none of your records will be copied, and neither will any of the configuration. ‘Copy of the existing database’, all the records will be recreated. However, changing a record in either the original or the copied database will not change any information in the other database – the data is not dynamically linked. In addition, to ensure that no Process runs unintentionally, any Process within the new Copy database will be deactivated.
- Retain User Configuration – Retain the User Configuration in the new database, i.e. the Users’ Default Own Org, User Groups. This does not grant them access to the new database; each of their Database Access Grants will have to be enabled first.
It may take a few minutes for your new database to be created and a pop-up notification will appear to show you when it has been created successfully. Please be patient and do not keep clicking New Database. If the size of the new database will take you over your contracted storage limit, Workbooks will not create the database and you’ll see a notification message telling you that it hasn’t been created.
Users of one database are visible in any other databases you have. This does not necessarily mean they can access all your databases though – to grant access you should click on the database and choose Add Users. Check the box(es) next to the names of those Users to whom you want to grant access, this can also be done on the Databases tab on the individual’s User record. You can also restrict access to a specific date range using the Valid from and Valid through fields.
NOTE: Removing the access that a User has to a specific database does not delete that User’s record, which you will still be able to find them by clicking Start > Configuration > Users.
Changing the Login Domain for a database
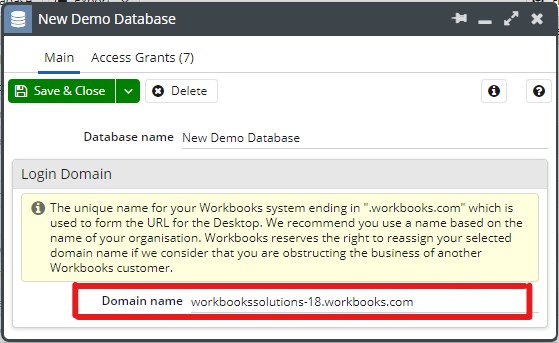
For increased security, you have the ability to assign a unique domain to each database within your account. Click Start > Configuration > Account Settings > Databases. From here, open up a database where you specify the Login Domain:

We recommend that you use a name based on the name of your Organisation eg, myorganisation.workbooks.com. The domain name field should only be populated with the text “myorganisation”.
When you click Save & Close, Workbooks will append the value entered with workbooks.com making up the rest of the URL. When setting this URL, there are a number of factors to be aware of that could affect other areas of your Workbooks configuration:
- Your users will be prompted to permit web Notifications to their browser from the new domain name.
- If you have previously sent emails with links to a Workbooks record, you will be prompted to login again, even if you are already logged in: they will refer to the prior domain name. Links going forwards will work correctly.
- If you have configured iframe custom fields which refer back to assets or processes within your database, the URLs of those will need to be updated to refer to the new domain name.
NOTE: We reserve the right to re-assign your selected domain if we consider it to be obstructing the business of another Workbooks customer.
Changing Database
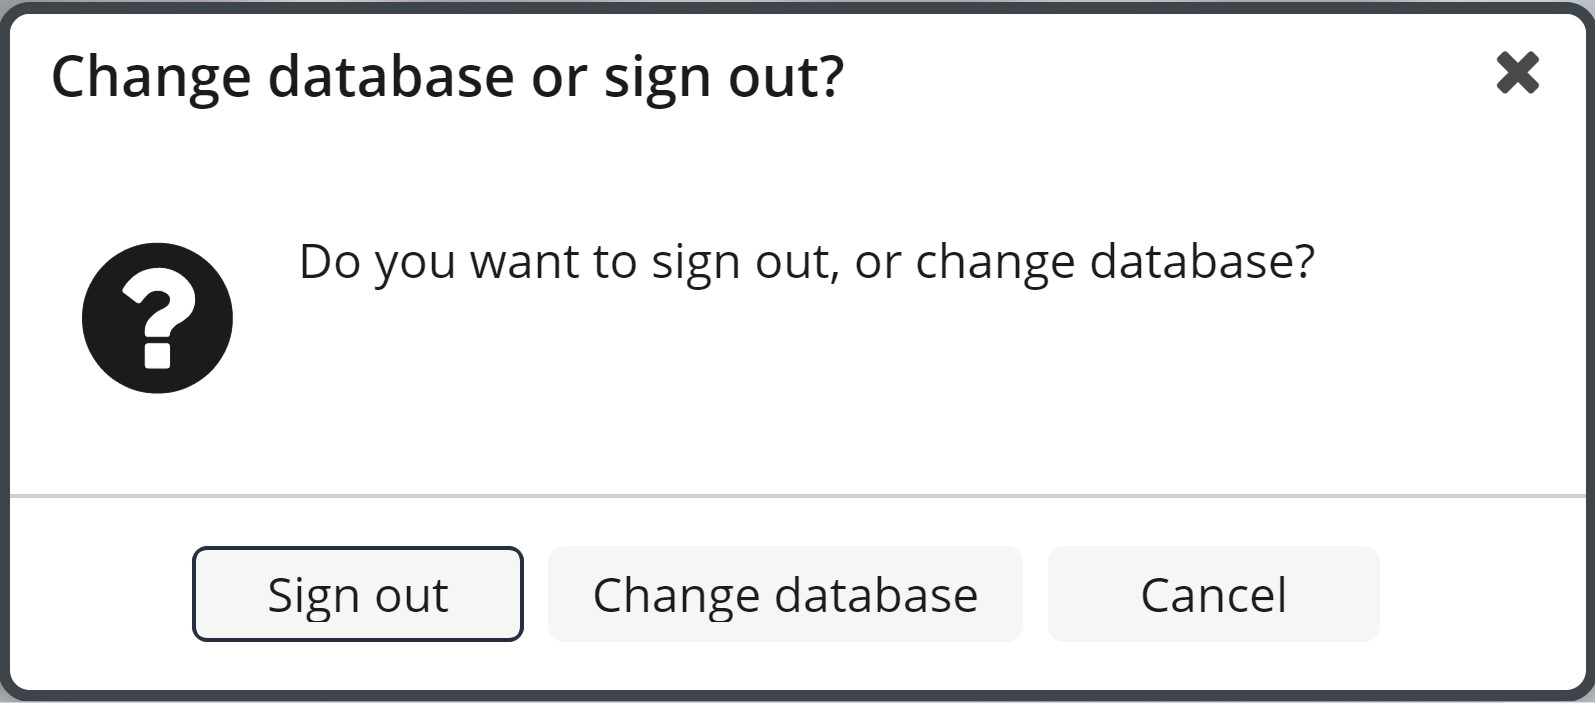
You can switch to any other database you have permission to access, without signing out from Workbooks. If you have access to more than one database, pressing the ‘Sign Out’ button on the start menu will bring up the message box below, allowing you to change database:

Archiving databases
Any database that has not been logged into within 30 days will be archived and taken off-line from Workbooks. The archived database will be kept for as long as your account is active.
If you log into an archived database, you’ll see a message telling you that the database has been scheduled for restoration. Typically the restoration will take a few minutes (depending upon the size of the database).
These archived databases will also be restored temporarily when:
- Creating a copy of an archived database: this will be performed by a background task and you will be notified upon completion.
- Adding or deleting a database access grant: this will be performed by a background task and you will be notified upon completion.
- Deleting users who have access to an archived database.
Within the Databases Landing Page (Configuration > Account Settings > Databases) a column called Status shows whether a database is archived or if it’s available