


Filtering
This is useful when searching or when you need to narrow down the results on your Landing Pages
How to filter grids
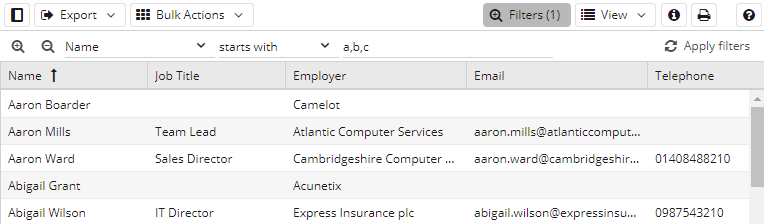
To apply a filter click on the Filters button at the top right of the screen.
Activating filtering will turn on boxes which allow you to specify the parameters you wish to apply to the grid. The total number of filters applied is displayed in brackets beside the filter button. You are able to hide/show filters to give you more space within the Landing Page by clicking the filter button. Applying a filter is a four-step process:
Step 1: Choose the field on which you want to apply a filter using the drop-down menu on the first box.

Step 2: Specify the filter type from the drop-down on the second box.
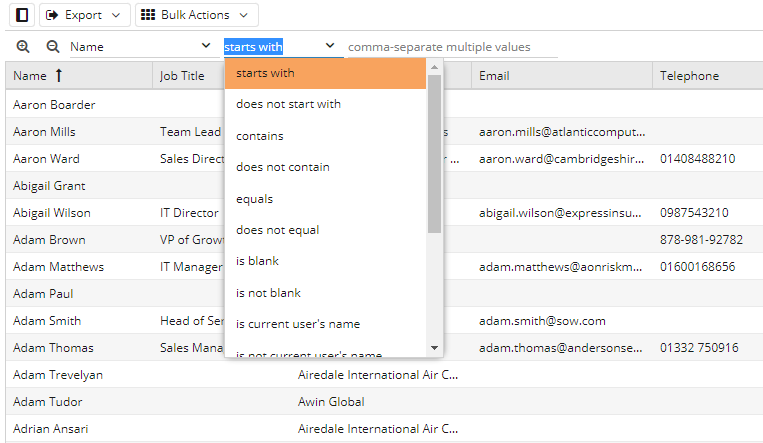
NOTE:
- The filter type varies according to the type of data you’re looking for. For example, if you’re looking for a date, you’ll be given the options of ‘after’, ‘before’, ‘on’, and ‘not on’ instead of the options shown above.
- There are a few dynamic filter types available. By selecting the filtering criteria of; is in calendar range, is not in calendar range, is in accounting period or is not in accounting period, it will be possible to create a dynamic view in which the Records presented may change to keep this information relevant to the current working day/month/period.

Step 3: Enter the criterion you’re looking for in the third box.
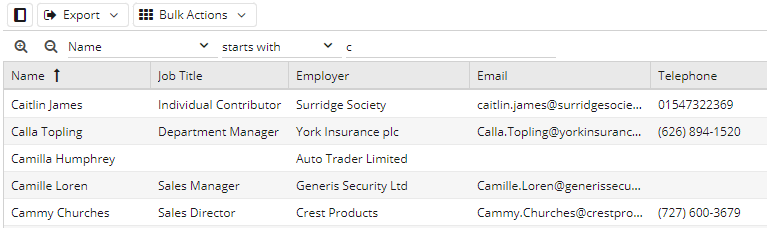
Step 4: Click the Apply filters button. The screenshot above shows a custom view for People with a filter applied to limit the view to only those People whose name begins with C.
Adding Additional Filters
Once you’ve applied at least one filter you can add additional filters by clicking on the plus ‘+’ symbol on the left. You can choose to apply all the filters concurrently (which will return records that fulfil all the criteria you’ve specified); alternatively, you can choose to apply the filters independently (which will return records that fulfil either the first criterion or the second criterion or the third criterion, and so on). This is controlled using the Match all filter conditions / Match any filter conditions drop-down menu on the right.
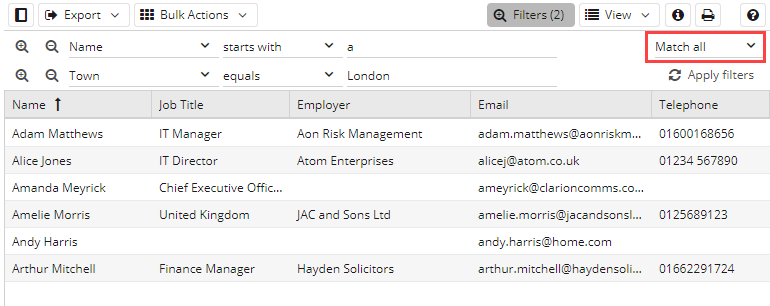
For example, the following two screenshots are based on the same People view as above. The first has a filter applied to limit the view to only those People whose name begins with A, which are based in London, so uses the Match all option.
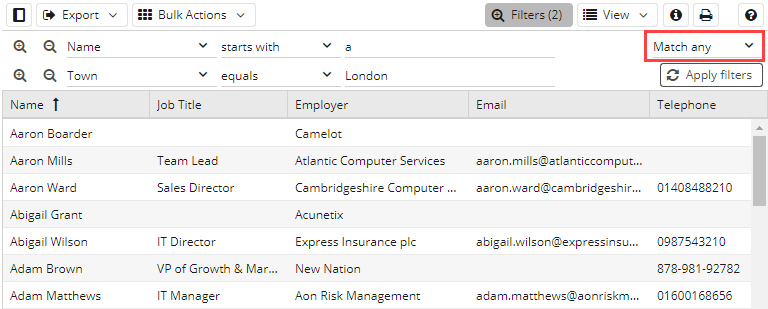
The next screenshot shows the same filters but this time, the Match any option has been applied so now we can see People which begin with A or which are based in London, which is why the first entries visible aren’t based in London.
If you want to apply more than one criterion to the same field (for example, you want to show the People whose names start with A or B or C, simply separate the criteria with commas).
You can apply as many filters as you like until you’ve identified the data you require.
Filters applied within Landing Page views can be saved and re-used later. To save a filter so that it remains in place every time you revisit the grid where you created it, click on the View button on the right and choose Save. When you next open this grid, the filtered view will be displayed and you can choose to leave it in place, modify it further (by applying further filter(s)), or reset the grid back to its original state (by clicking Reset).
Alternatively, you can save your filtered view and give it a name (this only applies to filters in Landing Page). To save and name a filter click on the View button on the right and choose Save as, which opens a dialogue box prompting you to enter and save a unique name for your filtered view. Any named views you’ve saved will appear in the left-hand column under My Views and clicking on these will activate the view.
Please use the following link if you would like to watch a video explaining ‘Applying Filters and Saving Views‘