Welcome Messages & Bulletins
Introduction
Workbooks allows you to compile and distribute messages to specified groups of Users within your database. You might, for example, want to use this feature to send a message to your sales team notifying them of a product promotion, give your team an itinerary for the day or send a message to all Users to let them know that an important customer is in your office. You might prefer sending this through Workbooks rather than sending via an email because it’s the first thing Users see when they log in, and is therefore more likely to get their attention, rather than getting lost in the morning email catch up.
These types of messages can:
- Be sent globally by Workbooks Online, or sent locally by those Users in your account who have the appropriate Capabilities.
- Be compiled in HTML or plain text format.
- Include pictures and links to files in your Upload Library.
- Be configured to appear for a specified amount of time.
- Be formatted as Bulletins or as Welcome Messages (these are displayed when the user first logs into the database and at every subsequent login unless the user switches off the Welcome Messages within Preferences).
- Be opened, snoozed or dismissed by the recipient.
Displaying Welcome Messages & Bulletins
Clicking on the Quote icon button next to the Logout button if you’re using the Clean Theme or from the User Menu > Bulletins if you’re using Green Theme displays the Bulletins Landing Page. By default, the Bulletins Landing Page gives you a choice of views, including:

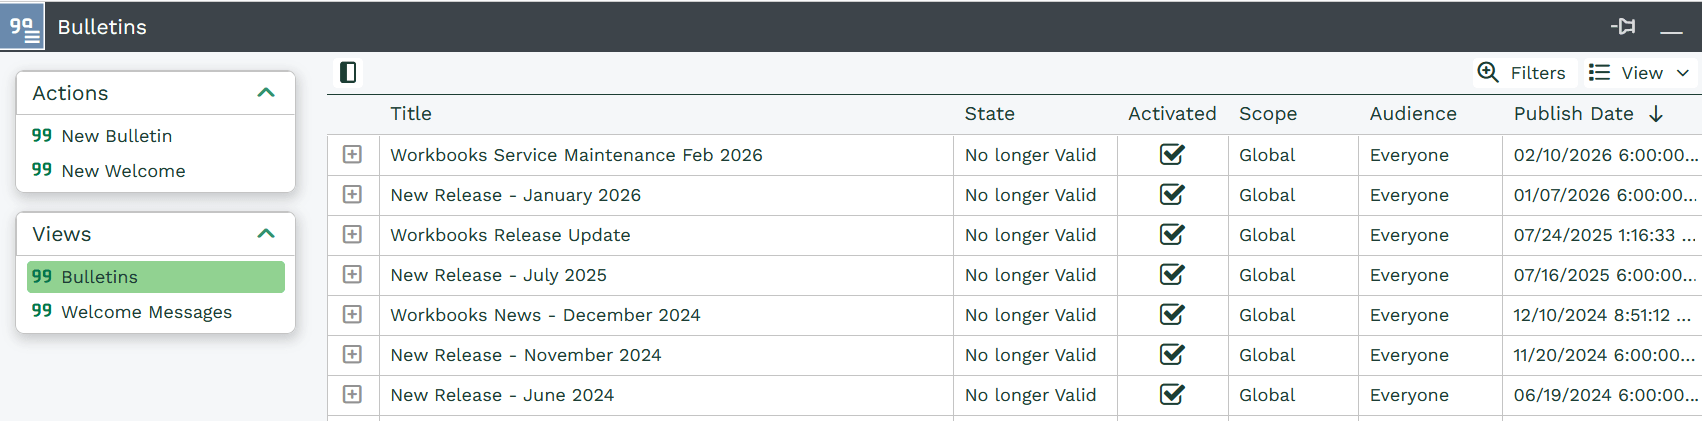
- Bulletins – displays messages appropriate to you (that haven’t been hidden).
- Welcome Messages – displays Welcome Messages appropriate to you (that haven’t been hidden).
Welcome Messages appropriate to you will be displayed when you first log into Workbooks and then every subsequent time unless you deselect the option Show this Message when I log in again at the bottom of the message and then close it. Alternatively, you can control whether or not you see the Welcome Message within Preferences.
If you opt to ‘switch off’ your Welcome Messages, you will still be able to see them via the Bulletins Landing Page (click on the User menu > Bulletins).
Creating Welcome Messages & Bulletins
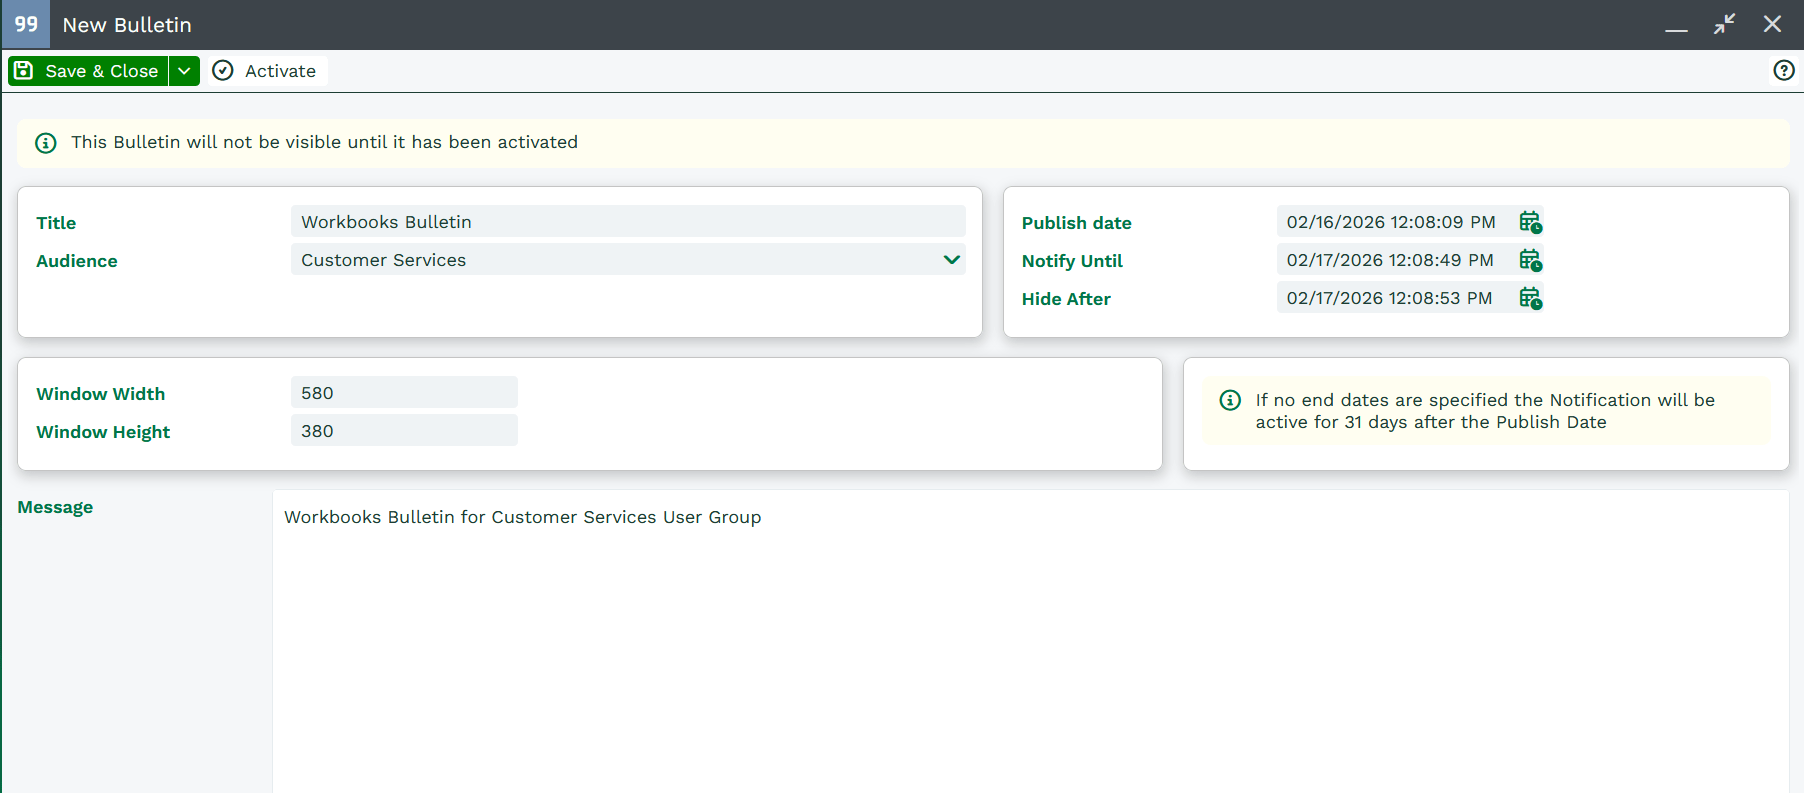
With the Bulletins Landing Page open, click New Welcome or New Bulletin. When creating your message remember the following:
Title
Give your message an appropriate name. This will be visible to the recipient so make sure it makes sense.
Audience
Use the dropdown picklist to choose to send your message to members of an appropriate Workbooks User group, depending on the information you’re sharing. If you want the message to be sent to members of more than one group you should either create duplicate messages or create a new group that combines the users that you want to receive the message
Note
Welcome Messages can only be sent to either the Everyone group or the System Administrator group
Window Width & Height
These fields control the size of the message window and default to 580×380. You can change this by overtyping the figures.
Publish date/time
This allows you to specify the date and time from which the message will start to be displayed when users log into Workbooks.
Notify Until date/time
This allows you to specify the date and time after which the message is no longer relevant. (If no date/time is specified for a Bulletin, it will be active for 31 days from the Publish date/time.)
Hide After date/time
This allows you to enter a date and time after which you want the message to be hidden from the Bulletins Landing Page.
Note
Users with the Capability to maintain Bulletins will still be able to see messages beyond their Hide After date/time.
Message
Create your message either by typing it into the message field or by clicking on the HTML button to enter HTML code. You can include pictures and links to your Upload Library, if required.
When you’ve completed your message you can click Save & Close. Remember to click Activate to make it visible to your specified audience.