


Creating Custom Record Types
Once the Module, Extension and Capabilities for Users have been configured, Users will be able to create Custom Record Types. This is accessed from Start > Configuration > Customisation > Record Types. Users with all of the correct configuration will see a button marked Add Custom Record Type.
Clicking this will open a new window that allows you to configure your new Record Type.

Name: The name of the Custom Record Type, as Users will see it in the database.
Icon: Select from an icon from the picklist that will be used to represent the Record Type. This will be used throughout Workbooks, including in the Start Menu and on Landing Pages.
Help URL: If you have your own internal knowledge base you can configure the help button to direct to a specific page.
Route: This will be used within the API as the endpoint, which will be defined as custom_record/route.api
Object Reference prefix: Here you can specify the Prefix used within your database, records will then be assigned the prefix and numbering as they are created, e.g. ASSET-123.
Show in Start menu: If this is set to True you will be able to find the Record Type within the Start menu. Users will still need the relevant ‘View…’ capability to be able to see the Record Type in the Start menu.
Description: Provide a description of the Record Type that will be used in the Record Types menu.
Once you are happy with the configuration of your Custom Record press create, this will open a customisation menu for that Record Type.
Note: Once configured Route and Object Reference prefix cannot be amended.
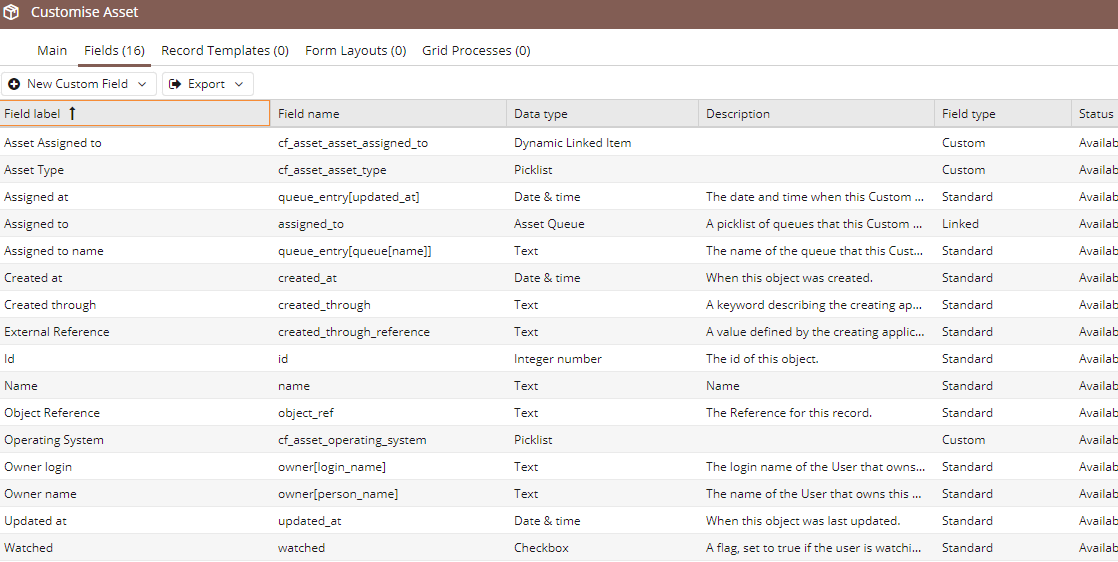
From within the Customisation Menu you can now further configure the Record, by creating any Custom Fields and Form Layouts needed. By default, there are 13 Standard Fields that are provided on a new Custom Record.
When you’ve created your Custom Record, Workbooks will automatically create capabilities for that record (Allow editing in grid; Create; Delete; Modify and View) but the only users with those capabilities will be System Administrators. If you want other users to access these records, make sure you give them the necessary capabilities. In addition, you need to create at least one Form Layout for it and share it with the appropriate users, otherwise, all they’ll see is a record with a name on it and no other fields. The Landing Page for your custom object will show the record’s Name, who it’s assigned to and the object reference but as with all grids, you can customise this to suit your needs.
There may be some instances where an individual name is not necessary on a custom record type. E.g. you may already have activities that are named and you don’t need individual names for the records created.
There is a checkbox on new custom records to specify whether the ‘Name Field’ is required or not. This can be found under the main tab of a newly created custom record, in the advanced section (expendable).
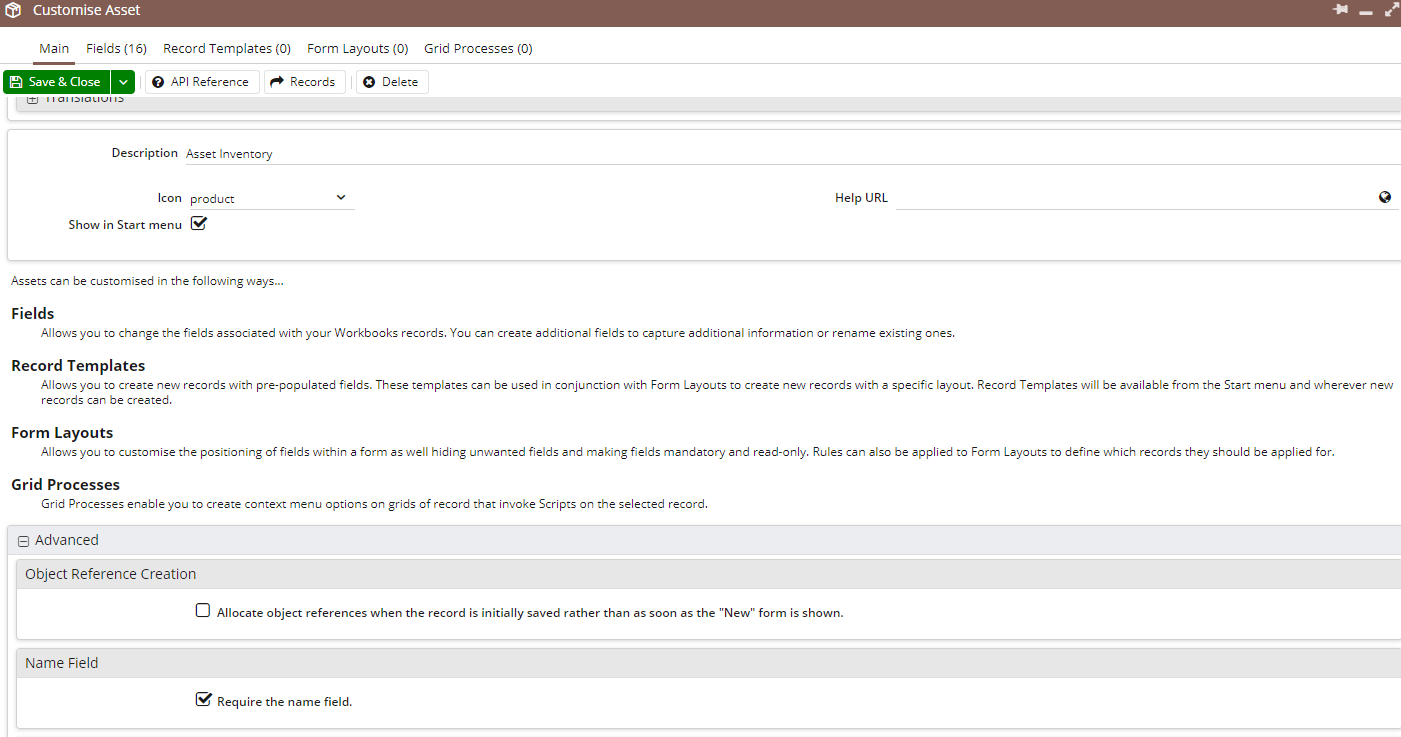
Note: This can only be applied to newly created records. It does not apply for pre-existing custom records.