Configuring the Outlook Connector’s Settings
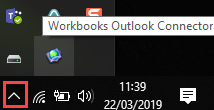
The Outlook Connector can be reconfigured at any time if your requirements change. These settings are configured as part of the initial setup and the First Run Assistant. You can access the settings via the Workbooks Outlook Connector icon in your system tray at the bottom right of your screen.
When you right click on the icon, you will be able to select Options…
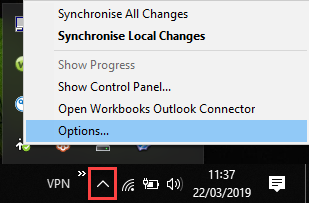
This will open a new window where you can access your settings and make amendments as required.
General
By default when opening the options menu you will see the General Settings.
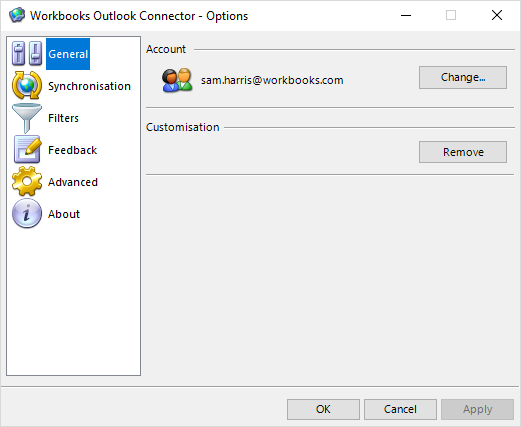
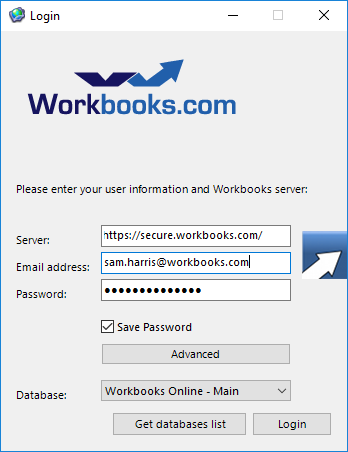
Account: This is the Workbooks Account that is being used to connect the Outlook instance to Workbooks. In most cases this will probably be the same as your email address.
Changing the Account will bring up another window where you can change the account configuration used by the Outlook Connector:
Server: This is the connection to the Workbooks service, this should not be changed.
Email address: the email address of your Workbooks Account used to login.
Password: This is the password for your Workbooks Account
Database: The Database that you will be connecting to when logging into Workbooks. You will need to use the Get databases list this will then populate this field with all available databases that you have access to.
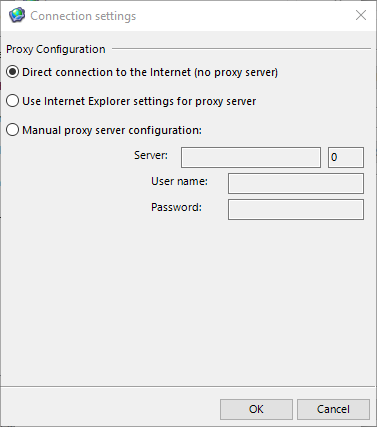
Advanced: From here you can configure the Proxy settings of the Outlook Connector. This controls how you are connecting to the Outlook Connector service. Most users will need to use either a direct connection or their Internet Explorer settings.
Customisation: Customisation can be removed to troubleshoot certain issues, this will only be required if another install or account is detected.
Synchronisation
This tab allows you to configure the frequency and settings around synchronisations. Such as whether you are notified of when a sync happens and how often they should occur.
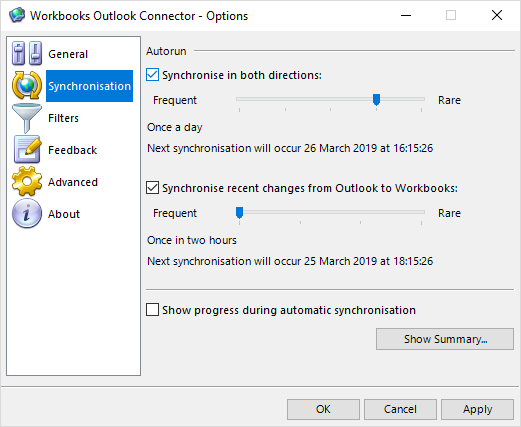
Synchronise in both directions: Set the frequency of a two way sync so new Workbooks records are created in Outlook and new Outlook records are created in Workbooks. This can be set to run at intervals from every 30 minutes to once a week.
Synchronise recent changes from Outlook to Workbooks: Set the frequency of a one way sync so new Outlook records are created in Workbooks. This can be set to run at intervals from every two hours to once a day.
Show progress during automatic synchronisation: Selecting this means that during a sync a progress bar will appear on the screen within Outlook.
Show Summary: Selecting this button will display the Control Panel so you can see if there are any outstanding issues from your most recent sync.
Filters
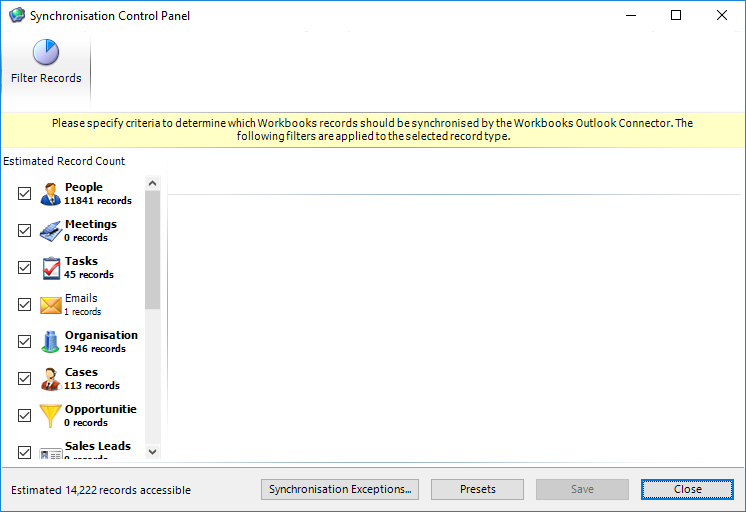
The Filters tab allows you to control which records are synced between Workbooks and Outlook. Filters can be applied to each Record type and controlled from this tab so that you only sync the records that you need to see in both systems.
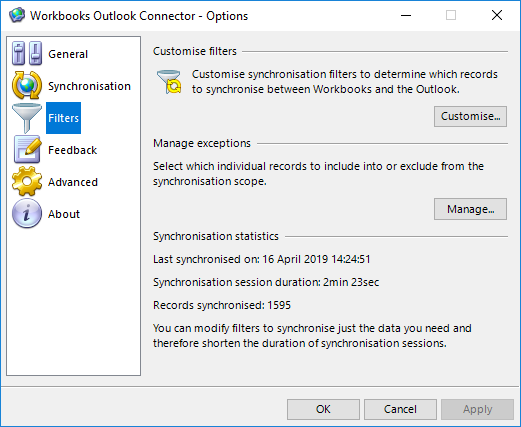
Customise filters: Selecting this button will open a new window where you can see what rules are applied for each record type within Workbooks in order to be synced back to Outlook.
From here you will see a list of every record type that can be synced with the Outlook Connector, any record that is syncing will have a tick in the box next to the Record’s Icon.
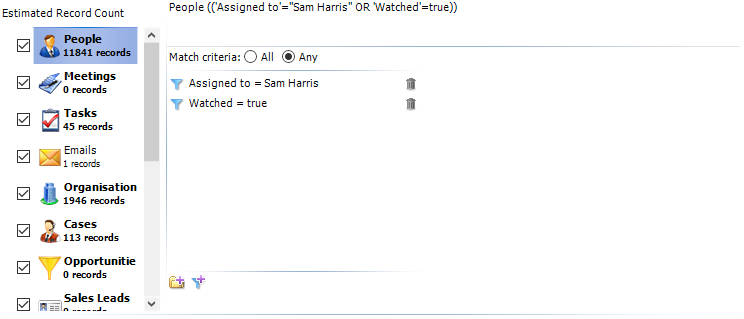
If you then select the Record’s Icon you can see the filters that have been applied to the record type when selecting what to filter. By default the Record will need to either be assigned to or watched by you.
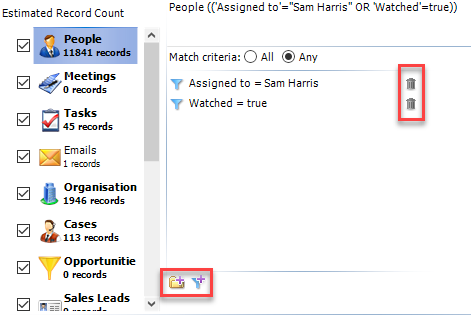
You can then remove any of the filters by selecting on the bin icon, or added back in by selecting the funnel with a plus icon at the bottom of the filters page.
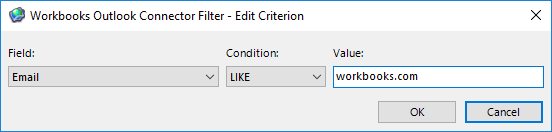
When selecting to add a new filter this will open a new window where you are able to select the Field you want to match on, the Condition and the value it should be looking for. These can be as specific as required, for example you may only want to sync people with a specific email domain:
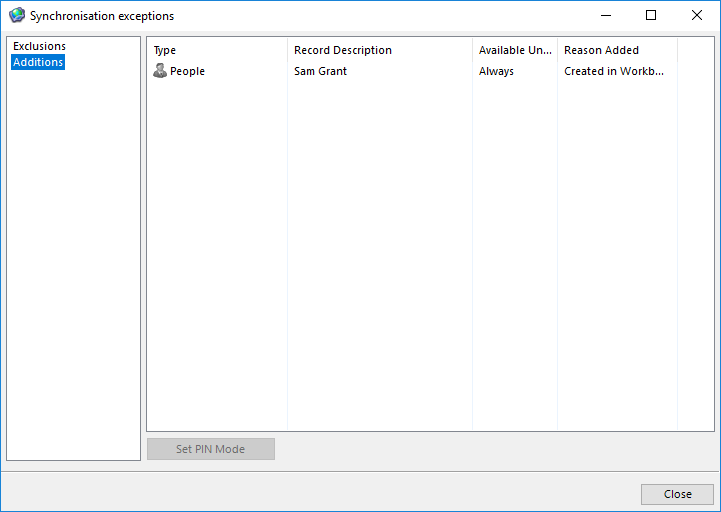
Manage exceptions: This is initially configured in the First Run Assistant when setting whether you want Contacts, Emails and Meetings to be automatically configured to a shareable state. This button allows you to include or exclude these record types in the future.
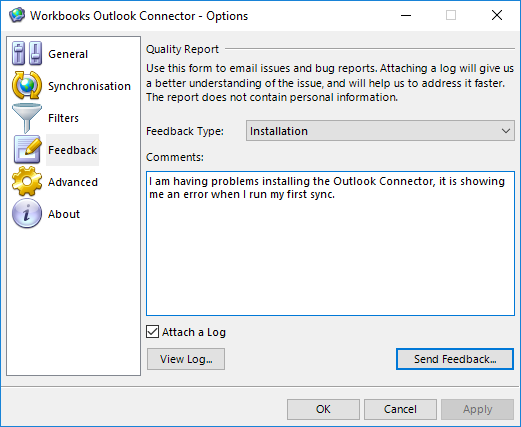
Feedback
This tab allows you to quickly create an email to the Workbooks Support Team, describing an issue as well as including error logs. This is an easy way to inform Workbooks Support of any issues with your Outlook Connector and provide the Support Team with everything required to start troubleshooting the issue.
Advanced
The Advanced tab allows you to further configure the Outlook Connector to fit your exact requirements.
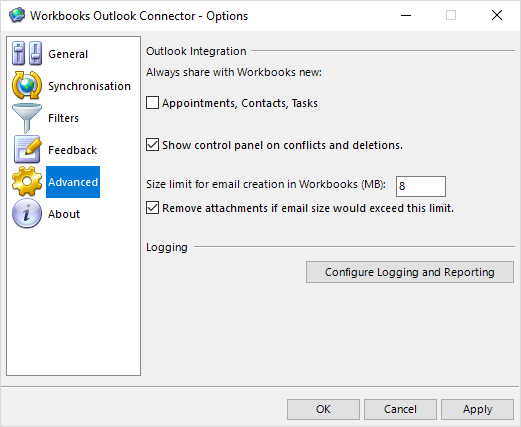
Always share with Workbooks new: Appointments, Contacts and Tasks: When any of these new records are created within Outlook they will be made shareable with Workbooks and created when the sync next runs.
Show control panel on conflicts and deletions: When a sync runs, if any conflicts or deletions are encountered during the process the Control Panel will be automatically opened to allow you to resolve these before the sync is next due to run.
Size limit for email creation in Workbooks: Here you can apply a maximum size limit to any email that can be processed by the Outlook Connector where a limit can be applied of up to 100MB. This is the limit for the entire email meaning rather than for individual attachments to the email itself.
Remove attachments if email size would exceed this limit: Applying this setting means that if an email exceeds the size specified in the previous setting then the body will still sync to Workbooks without the attachment. This allows you to retain communication visibility while using less storage space.
Logging: The Outlook Connector can be configured to capture different levels of logging, this should not need to be amended by yourself and only require a change when troubleshooting an issue with the Workbooks Support Team.
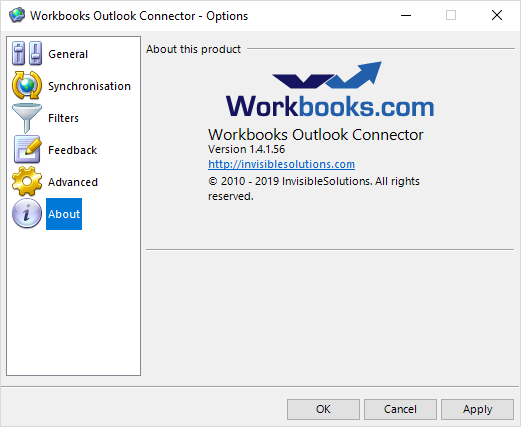
About
The About tab provides you with an overview of the Outlook Connector program that has been installed on your PC. This includes the latest version, if you are encountering issues with your Outlook Connector we always recommend that you check to ensure that you are using the latest version of the Outlook Connector.