


POSTED Workbooks Invoice to QuickBooks Online
What does this Zap do?
When you update an Invoice status from DRAFT to POSTED in Workbooks, the Zap will send the Invoice and Line Item data to create a copy of the Invoice in QuickBooks Online.
This Zap assumes that a QuickBooks Customer already exists and will search for an existing record before creating a new Invoice.
- For People, the Zap will search by email address in QuickBooks Online
- For Organisations, the Zap will search by name in QuickBooks Online
Ensure that a customer exists prior to this Zap running, by also implementing the Zap Template for creating QuickBooks Customers from Workbooks People and/or Organisations (see here). Alternatively, use some other method of syncing the data between each system such as manual export/import.
The Zap also assumes that you have imported your Workbooks Products into QuickBooks Online. When a Line Item is created, the Zap looks for a Product in QuickBooks Online using the Workbooks Product Refcode. It matches on the Product Name field in QuickBooks Online.
NOTE: If you do not wish to maintain your Products in QuickBooks, then delete this step from the Zap template and map the Product Refcode to the Line Description field in QuickBooks instead.
Setting up the Zap
A Zap Template called ‘Create new Workbooks Posted Invoice as new QuickBooks Online Invoice’ can be used to speed up the process of setting this Zap up. It selects the correct Trigger and Action for you, and sets up some field mappings. However, there are a couple of things that must be configured manually before you can use this integration.
Zap Template & Field Mappings
You can use the ‘Create new Workbooks Posted Invoice as new QuickBooks Online Invoice’ Zap template to help you set up your Zap.
This will set up the following field mappings on the QuickBooks Invoice Header:
| # | Workbooks Invoice Field | QuickBooks Field | Notes |
| 1 | Customer | Customer Id | Search in Step 2 of the Zap, finds the QuickBooks Online Customer as described and uses the Id to populate this field |
| 2 | Invoice Address | Billing Address | |
| 3 | Invoice Date | Invoice Date | The date the Invoice was created, unless changed |
| 4 | Payment Due Date | Due Date | |
| 5 | Object Reference | Invoice Number | NOTE: Do not remove this mapping as it is used to attribute QuickBooks Payments as they are received to the correct Invoice in Workbooks |
| 6 | Document Currency | Currency |
The following field mappings on the QuickBooks Invoice Line Items will also be set for you as part of the Zap Template:
| # | Workbooks Invoice Field | QuickBooks Field | Notes |
| 1 | Product Refcode | Product/Service Id | Search in Step 2 of the Zap, finds the QuickBooks Online Product as described and uses the Id to populate this field |
| 2 | Line Description | Description | |
| 3 | Unit Quantity | Quantity | |
| 4 | Unit Price | Rate | |
| 5 | Net Amount | Amount | |
| 6 | QuickBooks Sales Tax Id | Tax | See below section “QuickBooks Sales Tax” |
QuickBooks Sales Tax
The Zap can set the Sales Tax Code on each Line Item pushed to QuickBooks Online. This mapping must be added manually to your Zap as it is a custom field in Workbooks. Using our handy lookup tool on Products, you can set the correct QuickBooks Online value when you configure a new Product and thus ensure the correct Tax Code is set at the point of creating a new Invoice. See here for more information on this functionality.
Once you have configured your Products correctly, add the field mapping to Zapier to push the data across when a new Invoice is POSTED.
In the Tax field mapping, select “Use a Custom Value (advanced)“. In the new picklist that appears, select the field called “QuickBooks Sales Tax Id” from Step 1 of the Zap as shown:

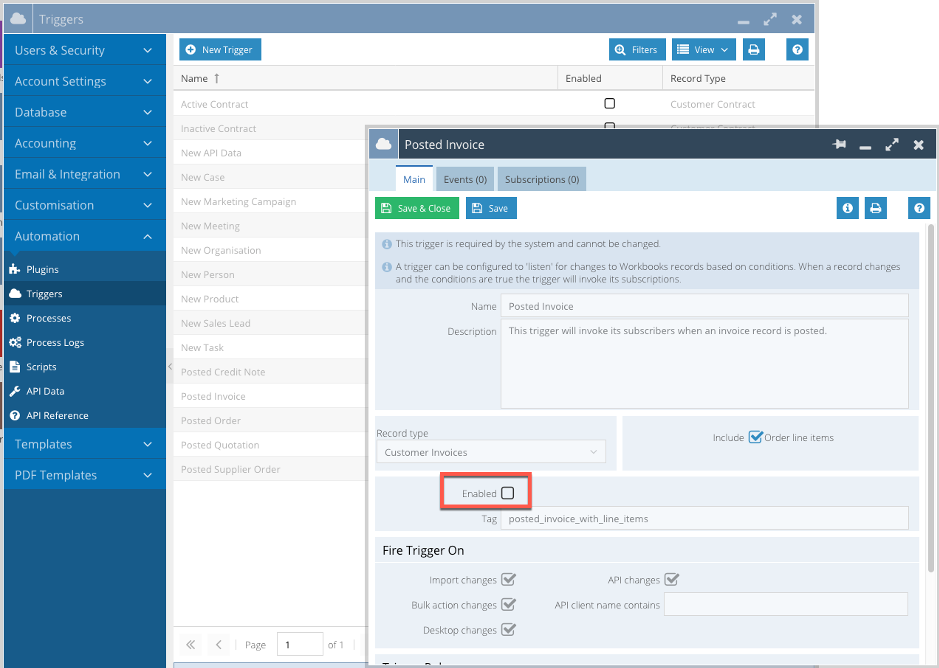
Enable the Posted Invoice Trigger
Under Start > Configuration > Automation > Triggers, locate the Posted Invoice Trigger. Open it, then tick the “Enabled” checkbox. Ensure that Include Order Line Items is also set to TRUE, otherwise, only Invoice Headers will sync to QuickBooks Online.
NOTE: You may require a change to the Ruby Rule to support your business requirements. The default trigger fires whenever an Invoice is saved where the Status is POSTED. If the Invoice has already synced to QuickBooks, this can cause an error as the Invoice already exists in QuickBooks. The rule can be changed to only send Invoices if the status has changed from DRAFT to POSTED. Currently, this rule can only be amended by our engineering team, please contact us to amend your database’s rule.