Customising the WESS Add-In
How it works
By default, the Workbooks Outlook Add-in displays several standard fields on the ‘Basic View’ such as a Person’s Name, Employer, and Email Address, with more information found on the ‘Detailed View’. System Admins can control what fields are displayed on both the Basic and Detailed View by creating new Profiles and applying them to specific Users or User Groups.
Note: There is no support for multiselect picklists.
Creating and editing new Add-in Profiles
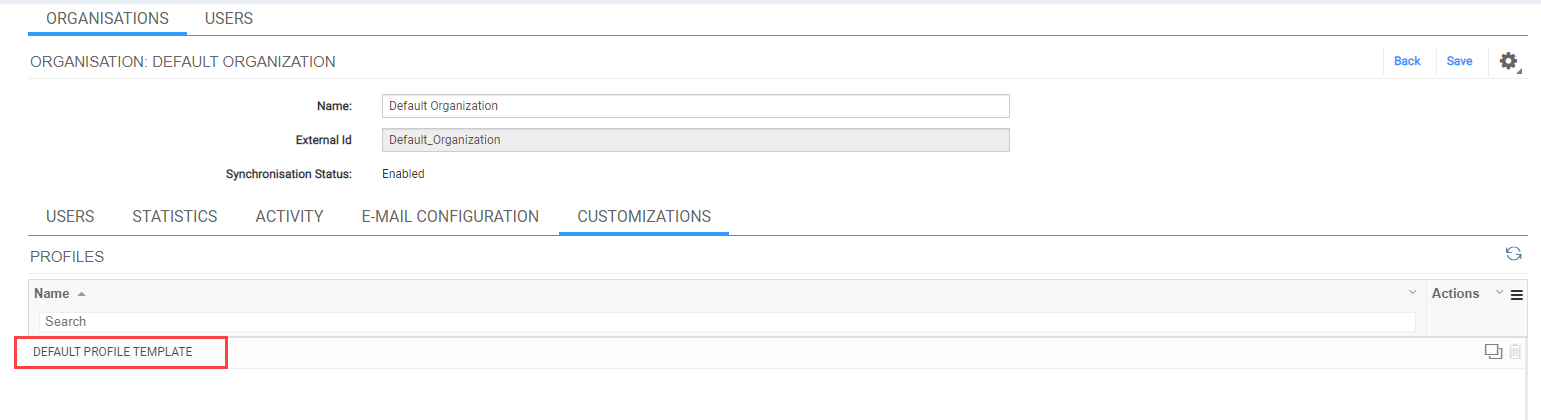
Go to Configuration > Email & Integration > Exchange Sync and click the ‘Configuration’ button. The configuration screen will open, and you will see a Default Profile which acts as the default setting for the Outlook Add-in and cannot be edited. You will need to go into this and select the organisation. From here, open the tab for customizations. Then click into the profile.
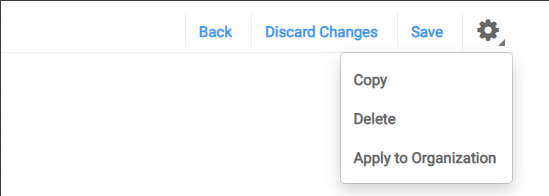
To create a new Add-in Profile, you must copy an existing Profile which can be done in two ways:
- Copy directly from the Exchange Sync Configuration screen.
- Copy from within the Edit view of an existing Profile.

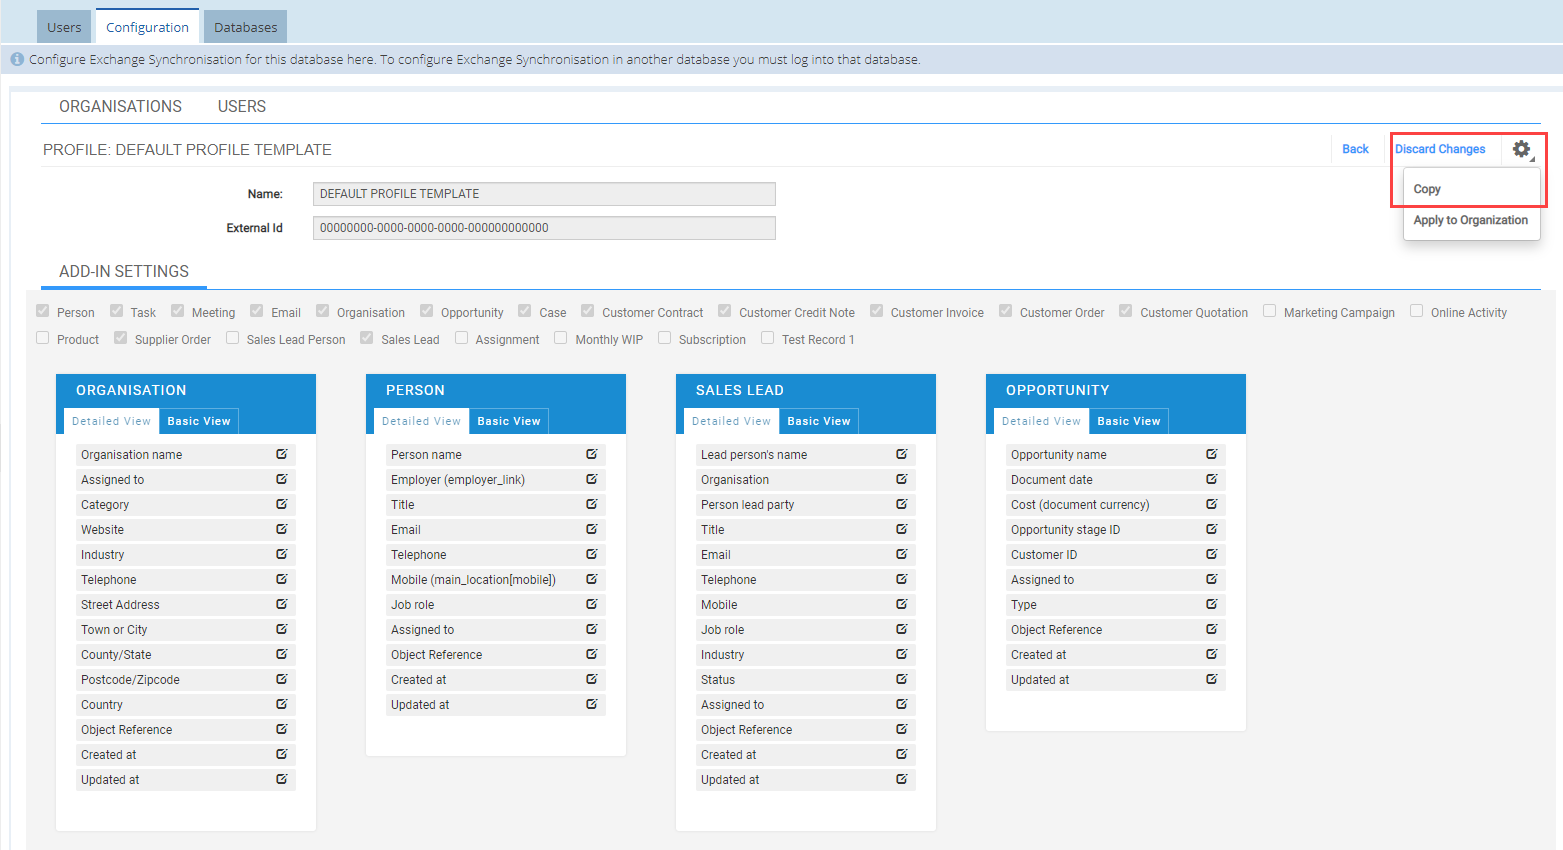
When you create a new Profile, the ‘Profile Configuration Screen’ will appear:
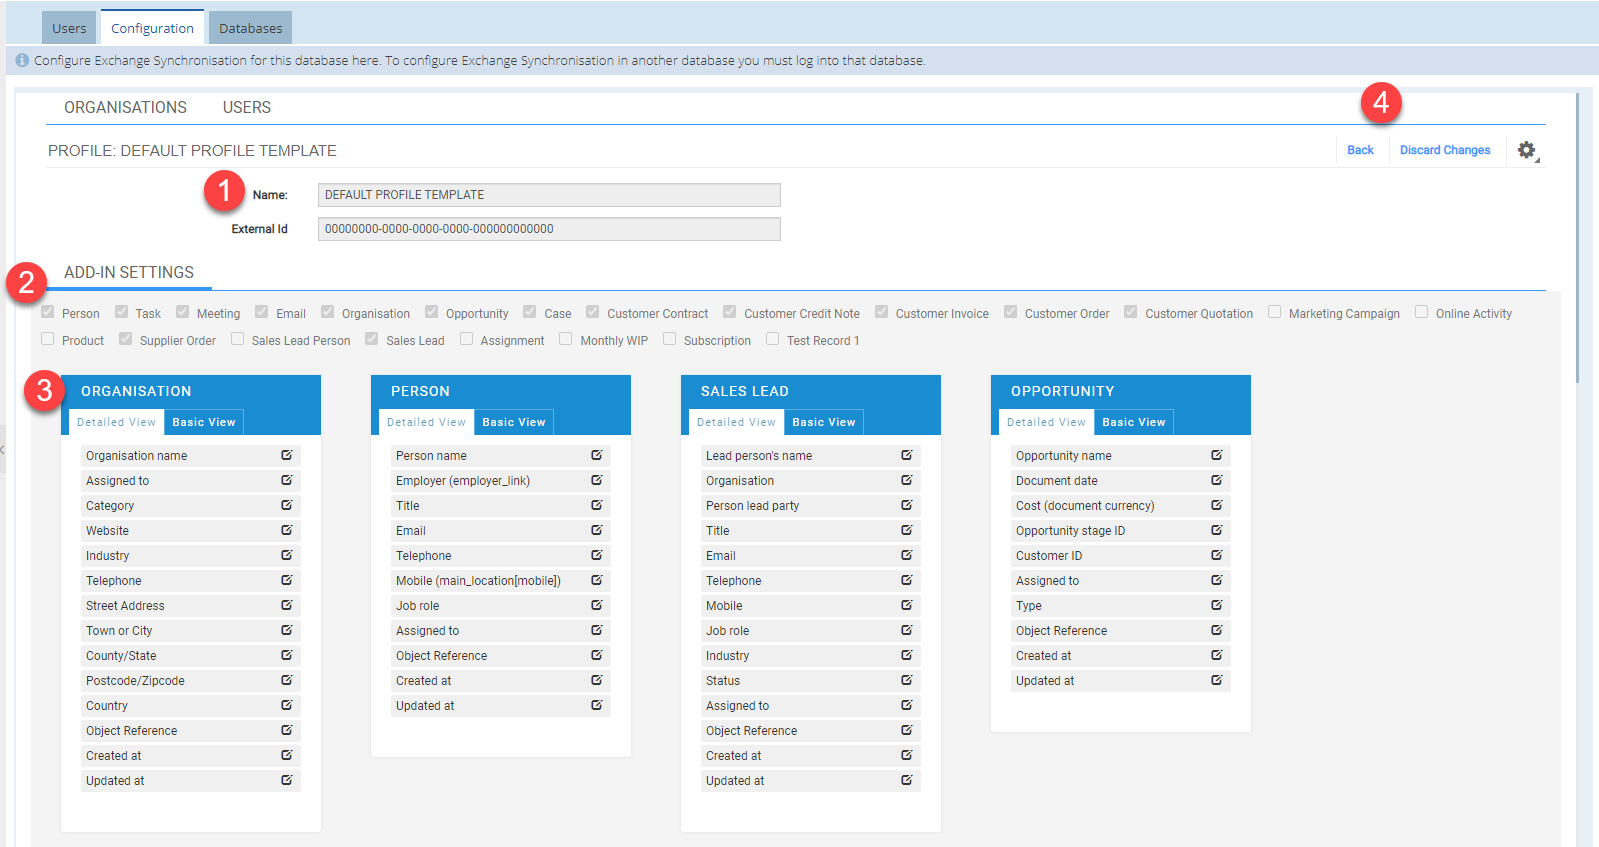
- The name of the Outlook Add-in profile.
- Checkboxes for each record type that is viewable directly in the Outlook Add-in; these can be toggled on or off depending on if you want that record type to be viewable in this Profile. Person, Meeting and Email are greyed out as these cannot be turned off.
- Individual blocks for each record type and the list of fields that are viewable and editable within the Outlook Add-in. Here you can manually turn fields off or on depending on what you want your users to be able to see when using the Outlook Add-in.
- The Basic View tab corresponds to the view that you see when you first load a Record within the Outlook Add-in. Use the picklists to control the Title field and the 3 other fields you want to show in this card view.
- Detailed View is what shows when you click on the Details button within the Outlook add-in. You can remove fields by using the cross icon and add them by clicking ‘Add Field to Detailed View’. You can add any number of fields from the Record type and drag and drop the fields to reorder them. Fields that are in the Details view can be edited in the Outlook Add-In, unless they are marked as Read-Only at the field level, so do not add fields that should not be edited.
- Discard Changes reverts the profile back to how it was when you originally opened it, not to the last save.
Applying Add-in Profiles to Users
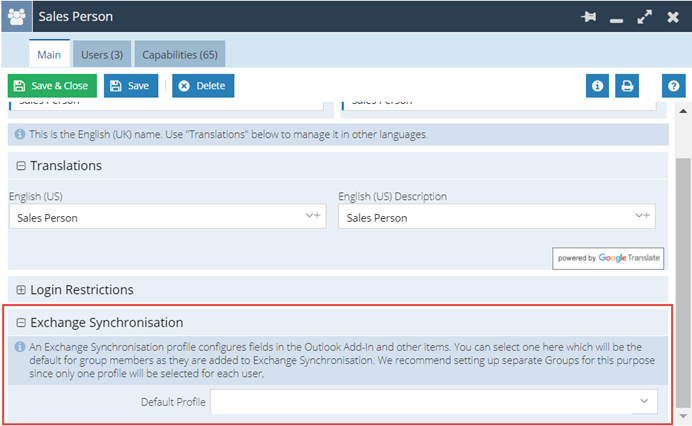
You can set the Default Profile the Outlook Add-in will use on a per-User basis, or by applying it to a User Group.
To set the Default Profile individually, go to Start > Configuration > Email & Integration > Exchange Sync > Configuration > Users select the User, and choose the Profile in the Exchange Sync section.
To apply a Default Profile to an entire User Group, go to Start > Configuration > Users & Security > User Groups, select the User Group, and choose the Profile in the Exchange Sync section.
You can also apply your profile to all users with ‘Apply to Organisation’