


Field Updater Plugin
Introduction
The Field Updater Plugin is available for all Workbooks customers and can be found in the Script Library. It is used to automatically update record field(s) using data that exists elsewhere in your database. For example, you might have a field that is used to monitor the last time a Sales Person called a customer – in this case you could use the Field Updater Plugin to automatically populate this field using the date/time of the most recent Phone Call Activity relating to the customer.
This plugin reduces the risk of human error in your database, and saves your Users time that would otherwise be spent manually updating fields on records, both of which can be invaluable in maintaining the integrity of your Workbooks system.
How it works
The Field Updater plugin is a User-friendly solution that is used and configured predominantly through the plugin UI itself; you can use the plugin to create any number of automated field updater processes, but each of these processes must be based on a report. To put it simply; when setting up the Field Updater plugin you will need to choose a report, a column in the report, and then link it up with the field you want it to be used to populate.
The plugin will install a Scheduled Process which will run in the background of your database and work through the report’s rows to populate the specified field – you can configure this process as you normally would (e.g. restrict the time in which the process will run).
Setting up the plugin
Before installing the plugin, we would recommend creating the report you are going to use as this will make the plugin setup more straightforward. When creating the report, it is important to remember that the plugin will work through each resulting row and update the specified field accordingly, and you must consider how you will prevent the process from repeating itself. We recommend including a calculated column that outputs a 1 or 0 and use a calculated criteria so that the column serves as a ‘Show’ or ‘To Update’ column (e.g. if the output is 1, then show the row and therefore update the field. If the output is 0, hide the row as it does not require updating).
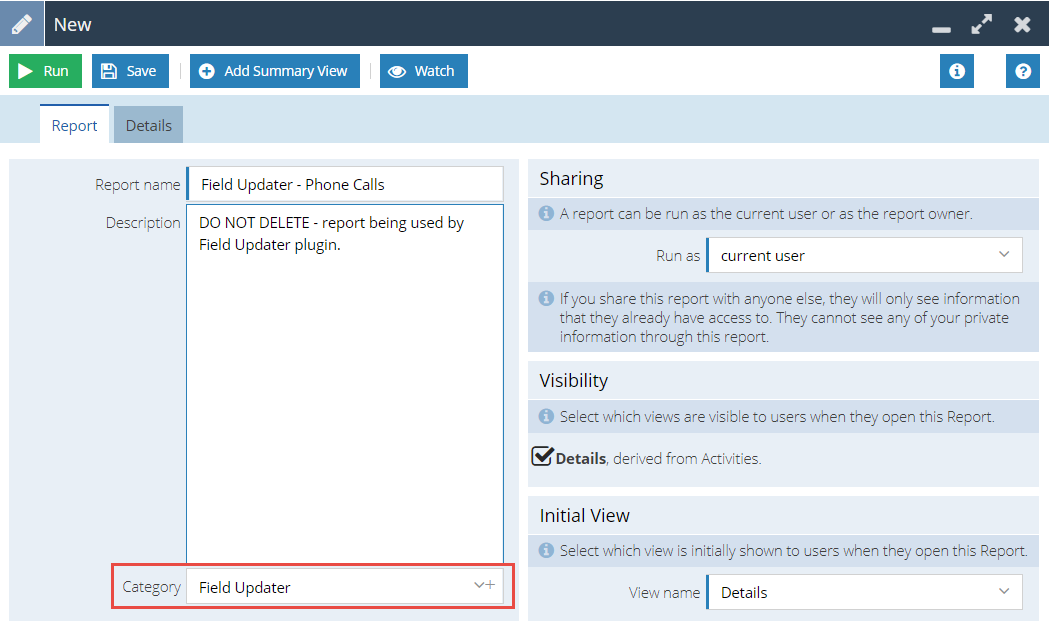
You will also need to ensure that the report includes the destination record’s ‘Id’ and ‘Lock Version’ as columns, and that the report is set as being in the Field Updater category (you will need to add this category by simply typing in ‘Field Updater’ into the Category field) as shown in the screenshot below. In summary, you must remember these three important things:
- Include the ‘Id’ of the record type you’ll be updating
- Include the ‘Lock Version’ of the record type you’ll be updating
- Ensure that the Report is in the ‘Field Updater’ Category, which can be amended in the ‘Report’ tab of the report itself
NOTE: In order to proceed with the following steps, you will need to have System Admin capabilities on your database.
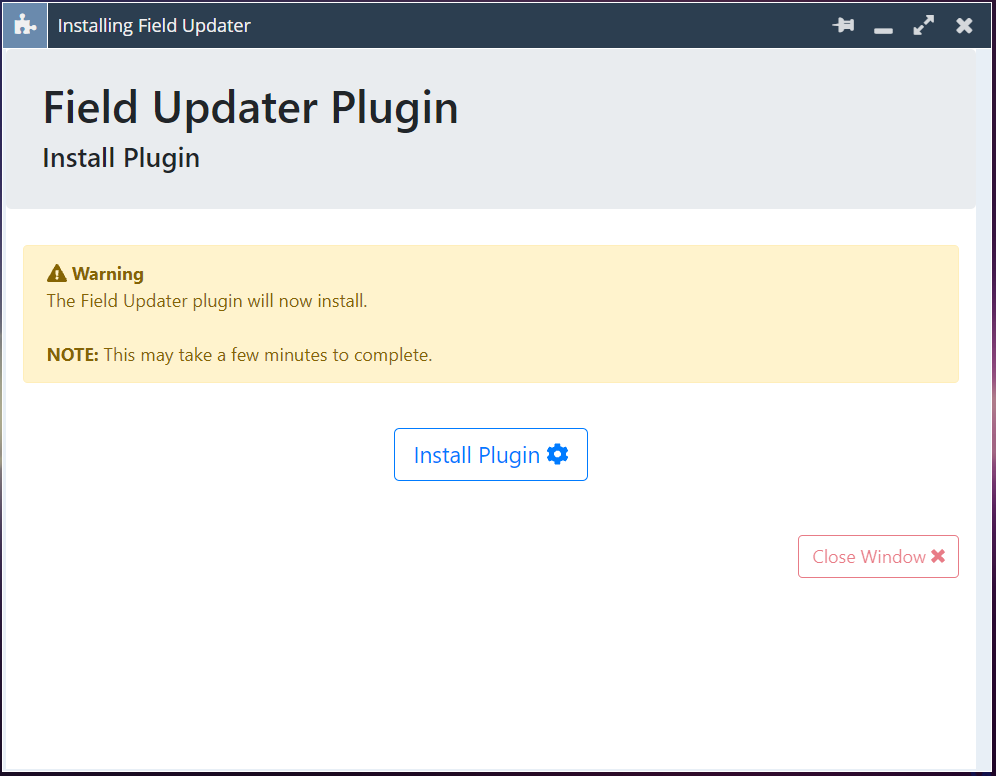
First you will need to go to Start > Configuration > Automation > Plugins, and select the ‘Add Plugin’ button in the top left. This will open a new window where you’ll need to select the source of the plugin (in this case, Script Library), and what plugin you’re going to install: Field Updater.
The Plugin will open, prompting you to install it. Press ‘install’ and wait for this to complete, after which you’ll need to close the installer and close and re-open your Configuration window so that it gets refreshed.
Then, open the Email & Integration section and select Field Updater. This is where the plugin is accessed now that it has been installed.
The plugin will now inform you that you haven’t got any Field Updater processes running and prompt you to add one via the Add button. Here you will select the report you have created and select the data view (report tab) you’d like to refer to.
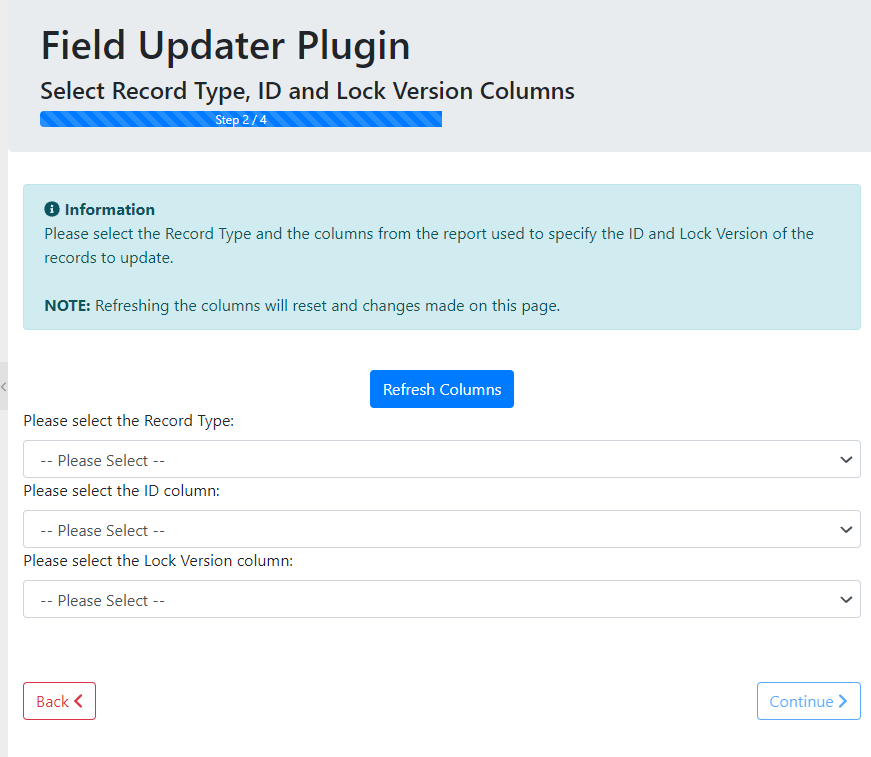
The next step is to identify which record type you’d like to update with this process, and in the next two dropdowns you’ll need to select the column from the report that refers to the record’s Id and Lock Version.
Once this has been done you’ll be asked to identify the field on the record you’d like to update, and the column in the report you’d like to update the field with, then hit ‘Continue’.
The final step is a confirmation of everything you’ve entered thus far, so you can review it if necessary. When you’re ready, scroll to the bottom and click ‘Add’.
The plugin will then return to its home page, and you’ll see your new Field Updater process listed and that it is marked as ‘Inactive’. Click on the row (you may need to click on the actual text in the row) and it will expand, allowing you to set up a schedule for this process. Configure that however you’d like, and then press ‘Resume’; you may get a popup asking you if you’re sure you’d like to resume the process, if so, click Yes/Okay, and wait for the Plugin to refresh.
Ensure that the process is now marked as ‘Active’, with a green pulsing dot, and then the plugin setup is complete.