


Configuring Workbooks and DotDigital
How to set up the dotmailer integration, integrate your chosen Workbooks Campaigns with dotmailer and manage the dotmailer synchronisations
The following information assumes that you have completed each of the pre-requisite steps on the previous page, here. If you do not complete these steps then the integration will not function correctly and/or some steps cannot be completed.
At the time of writing these instructions are correct but over time these may change, if in doubt refer to DotDigital help pages for the latest DotDigital guides. The following links can be clicked to take you to the relevant section within the guide:
- Creating a DotDigital API User
- Setting up DotDigital within Workbooks
- Configuring Custom Field Mappings
- Synchronising Workbooks Marketing Campaigns to DotDigital
- Reporting on the Campaign Results in DotDigital
- Viewing Workbooks Campaign Summary
- Synchronising DotDigital Results into Workbooks
- Maintaining the DotDigital Processes
Step 1: Create a DotDigital API user
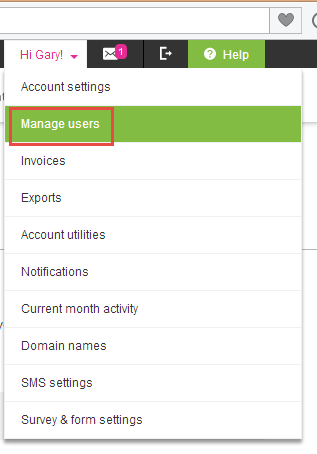
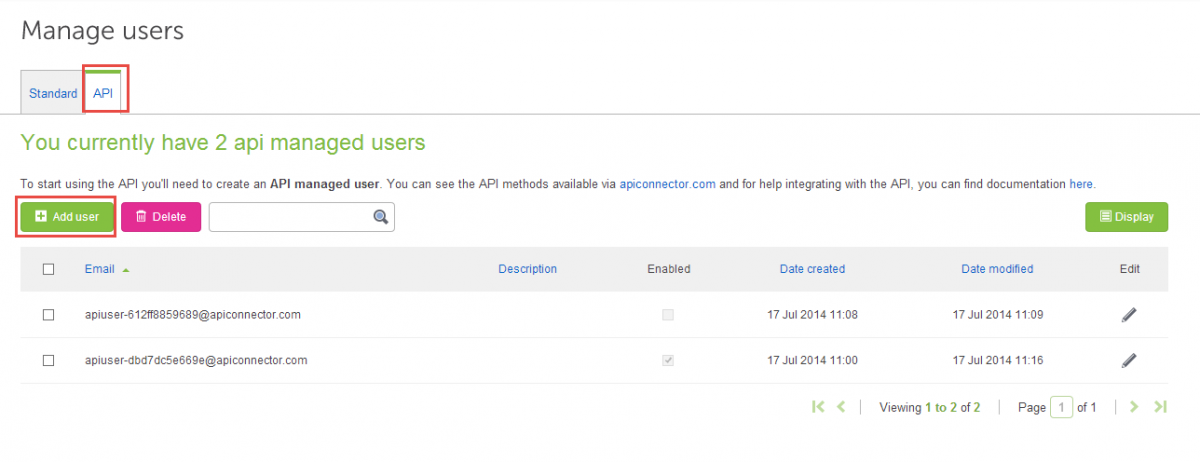
Login to your DotDigital account, under the dropdown menu where it says Hi XXXX, click Manage Users. From here, click API and then Add User.
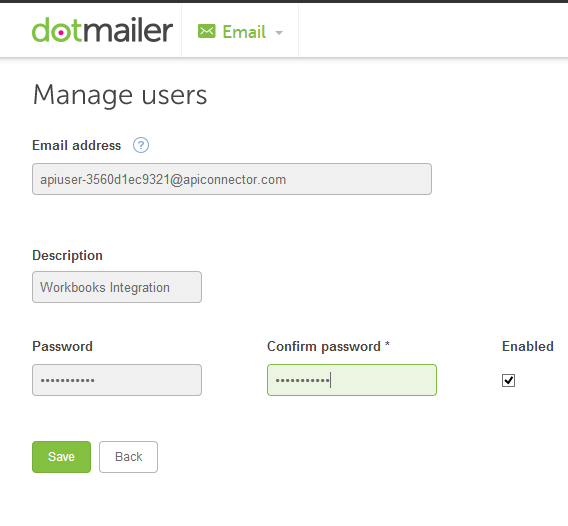
An email address will be automatically generated by DotDigital which cannot be changed to ensure that this is unique. We advise that you enter in a description so that the Workbooks/DotDigital integration can easily be identified at a later date.
Ensure that you enter a memorable password
NOTE: Write this down somewhere or ensure you remember it as this will be required for Step 2.
Also ensure that the Enabled tick-box is checked.
Step 2: Setting up DotDigital within Workbooks
Navigate to Start > Configuration > Email & Integration > dotmailer. Enter the API user email address that was generated in Step 1. If you haven’t created it already you can click on the link provided from within Workbooks which will take you to the page where an API user can be created.
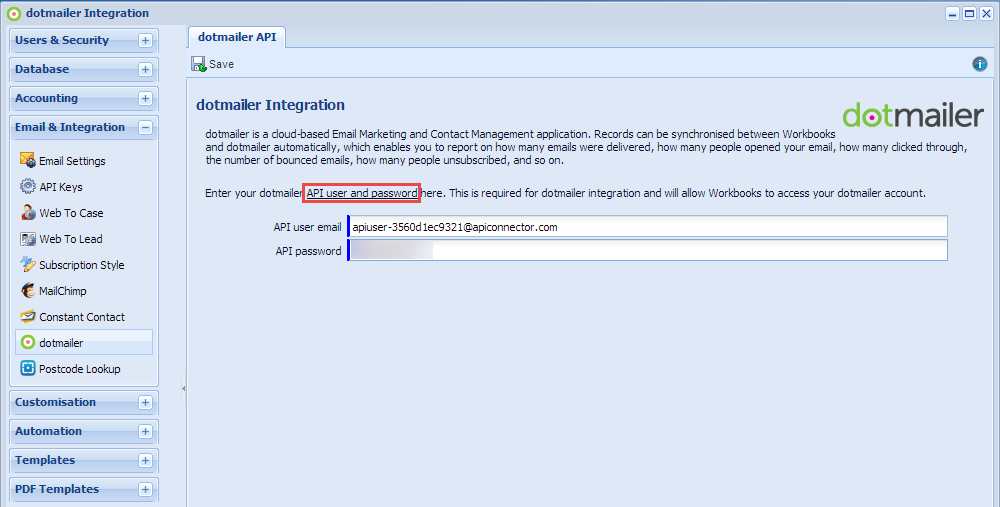
NOTE: When clicking the link, you will be taken to a login page which asks for your DotDigital credentials. This is separate to the API username and password.
Ensure that you enter in the credentials exactly as they are displayed in DotDigital otherwise you will not be able to login. If successful, you will see the following screen:
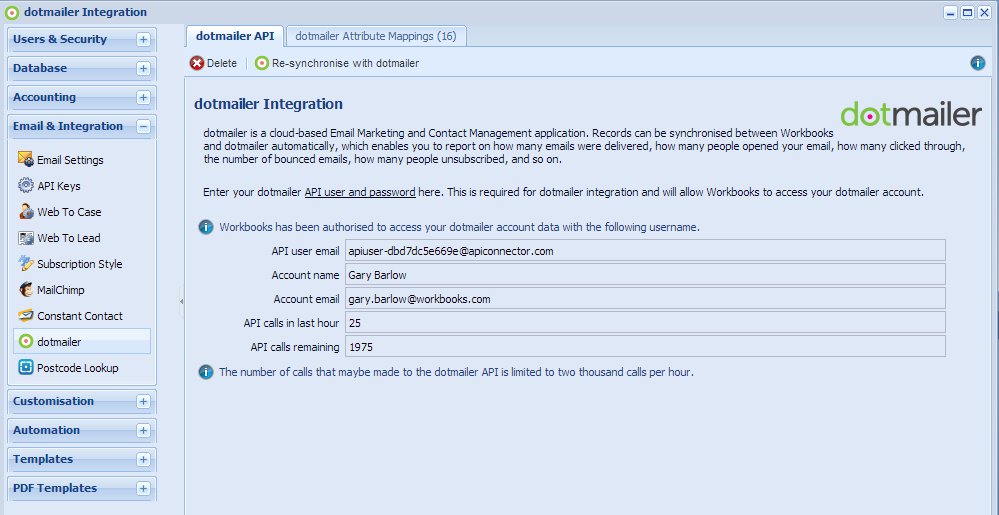
The above screen displays information on the account credentials used, the number of API calls in the last hour and how many you have remaining.
From here you can configure additional mappings for custom fields, delete the integration completely if you wish to link Workbooks to another DotDigital account or click Re-synchronise with DotDigital to synchronise all Marketing Campaigns (see Synchronising Workbooks Marketing Campaign Members to DotDigital for more information on this).
Step 3: Configuring Custom Field Mappings
The Workbooks/DotDigital integration wizard creates a total of 16 mappings automatically for the most common fields when you setup the integration for the first time. The mappings created include mainly fields that you need to send out a campaign such as a person name, email address and employer.
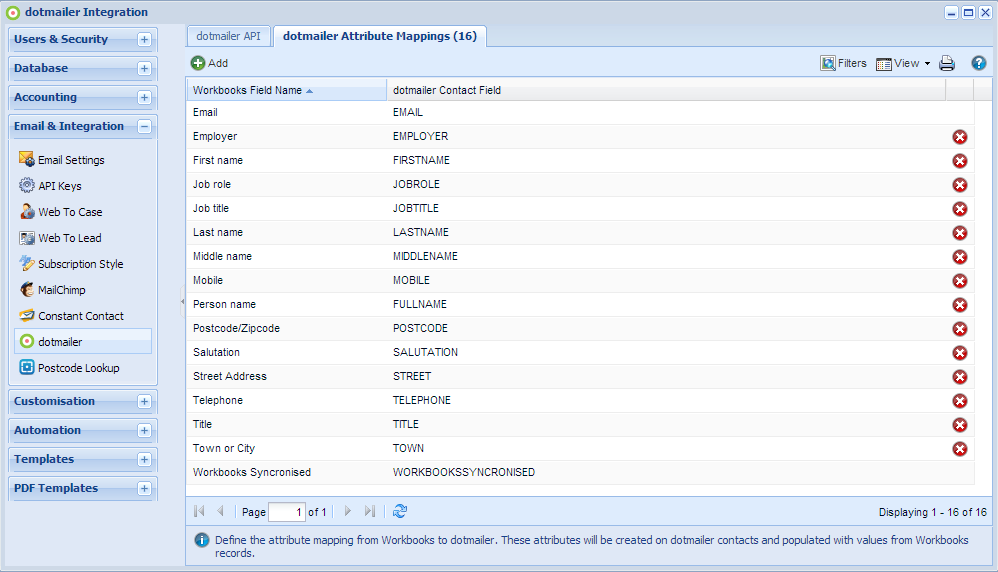
At a later date, you can change these mappings easily from Start -> Configuration -> Email & Integration -> dotmailer -> dotMailer Attribute Mappings. Under the Attribute Mappings tab, click Add which will show the following screen:

The Workbooks Field Name field provides a picklist for fields available on the Person and Sales Lead records in Workbooks. Notice that if a field is only available for either a Person record or a Sales Lead record this is shown in brackets after the field name.
Fields that are common to both Sales Leads and People are not followed by anything in brackets. Choose the Workbooks field and then enter in the corresponding DotDigital field name. As this field is free text, you will need to ensure the name is entered exactly as it appears in DotDigital to avoid any data synchronisation issues between the two systems.
NOTE: There are limitations on the number of field mappings that can be created. See Limitations above for more information.
It’s simple enough to create new custom fields in both systems so that additional data can be captured in Workbooks and used in your DotDigital campaigns. For more information on creating Workbooks Custom Fields, see here. For information on how to create DotDigital custom fields, see here.
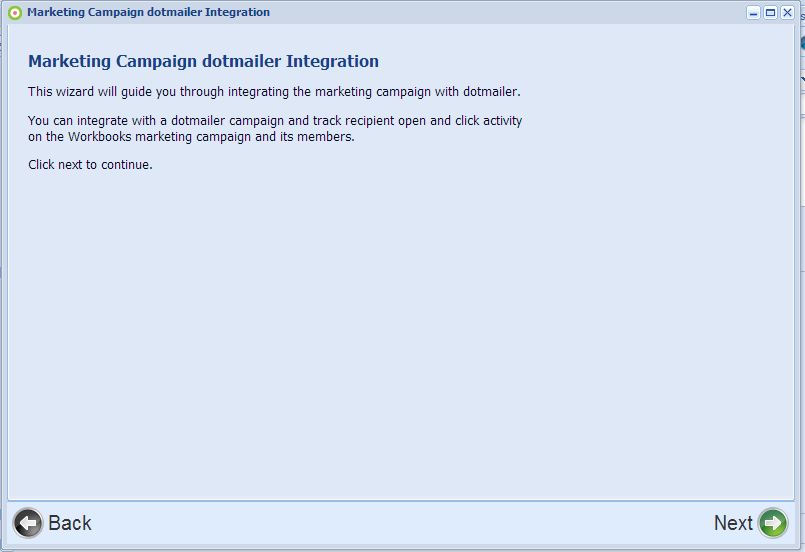
Step 4: Synchronising Workbooks Marketing Campaign Members to DotDigital
You now need to create a Marketing Campaign in Workbooks and add some members. For more information on doing this, click here. To integrate this individual Campaign with DotDigital, click dotmailer Integration.

NOTE: If you have configured more than one Marketing service with Workbooks, you will be given an Email Marketing Integration option in place of the DotDigital Integration button to select which service you wish to integrate your campaign with.

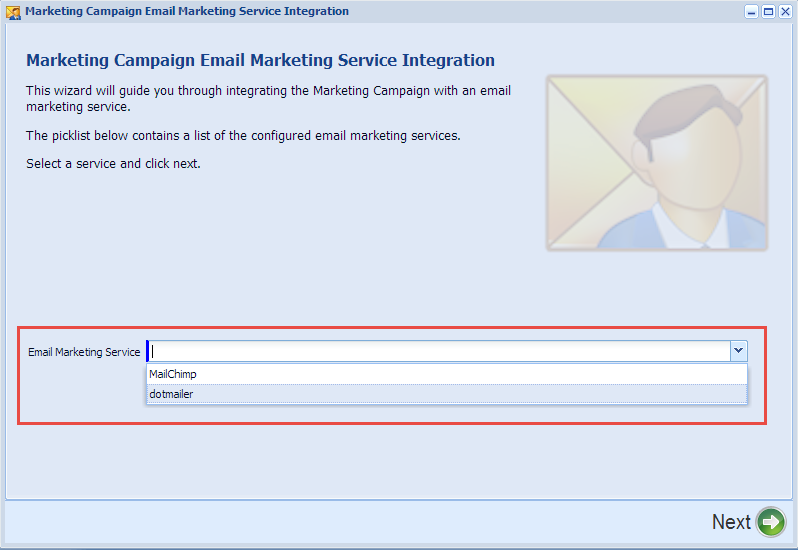
On the first screen of the wizard, simply click Next.
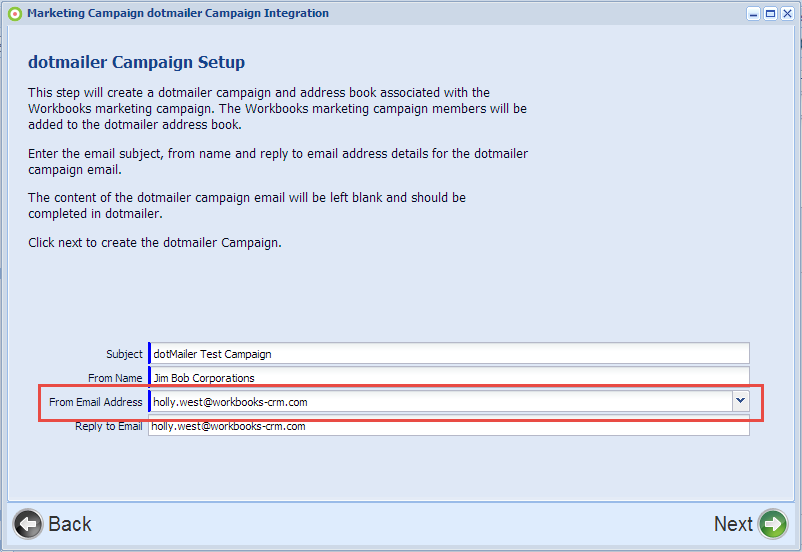
The second screen allows you to set a campaign subject, who the campaign will appear to come from and also the reply to email address. The subject will become the subject line of the emails that are send out from this Campaign when successfully synchronised. This information can be changed later.
You will also be able to set the email content based on a template from your ‘My Templates’ folder in DotDigital, or based on a previous Campaign. You can select the available options from the dropdowns or leave as ‘No Template’/’No Campaign’ to keep the content blank. Note that Free Templates will not be available in the Template dropdown list. Click Next when you are happy with the entries.

NOTE: If you have more than one From Address configured for your campaigns in DotDigital, you will see an additional field here called From Email Address. This will be a picklist that displays the available values from your DotDigital account. If you only have one configured you will not be given the option to change it here.
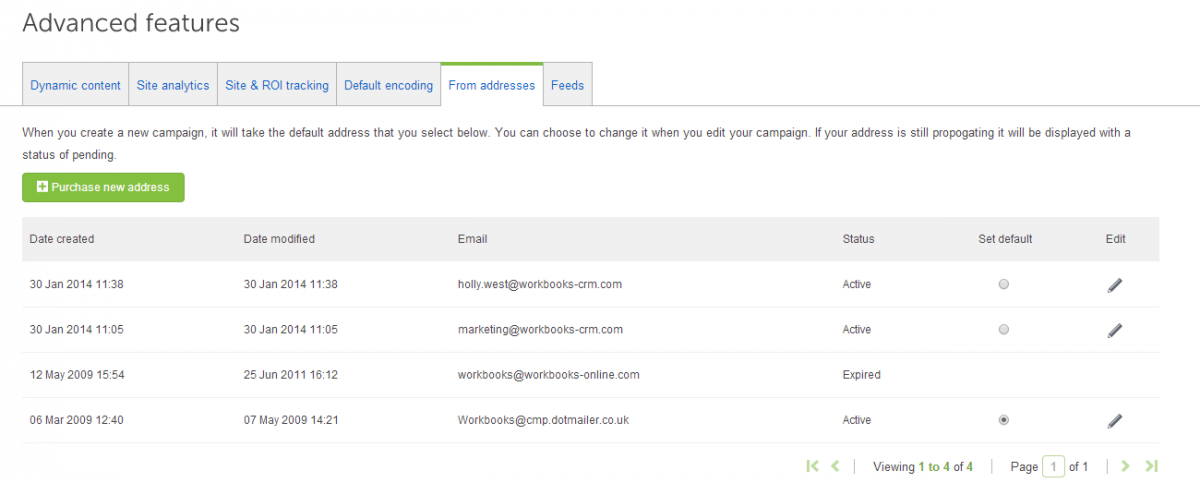
Within DotDigital, this can be configured under Campaigns -> Advanced Features -> From addresses:
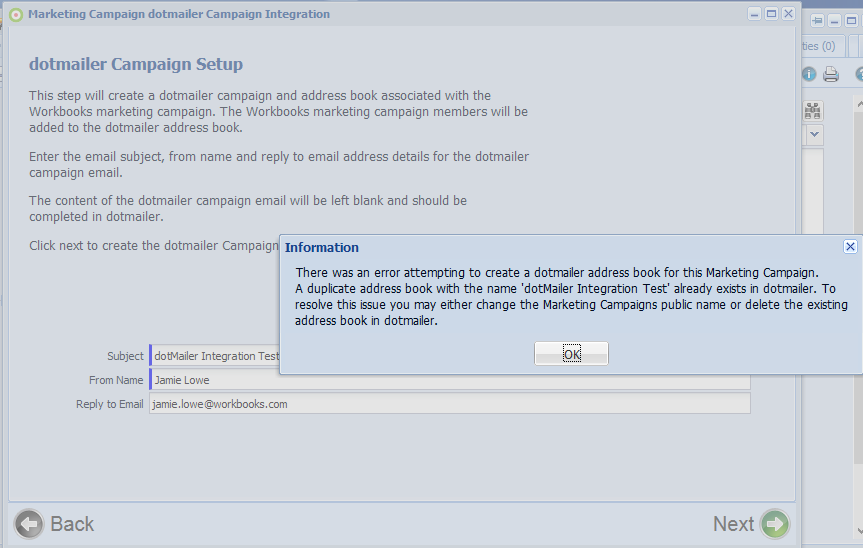
If there is already an Address Book in DotDigital with the same name as the one that you try to create, you will see a warning message as shown below and you will be unable to progress further until you change the name or delete the duplicate manually from DotDigital:
The third and final screen simply confirms that an Address Book in DotDigital will be created for this campaign and the Marketing Campaign Members will also be synced across.
If you add additional Members later on, you will need to wait for the DotDigital People Leads to DotDigital process to run or start it manually. This process acts as an update to an existing campaign in DotDigital. For more information about manually running a process, see Step 6.
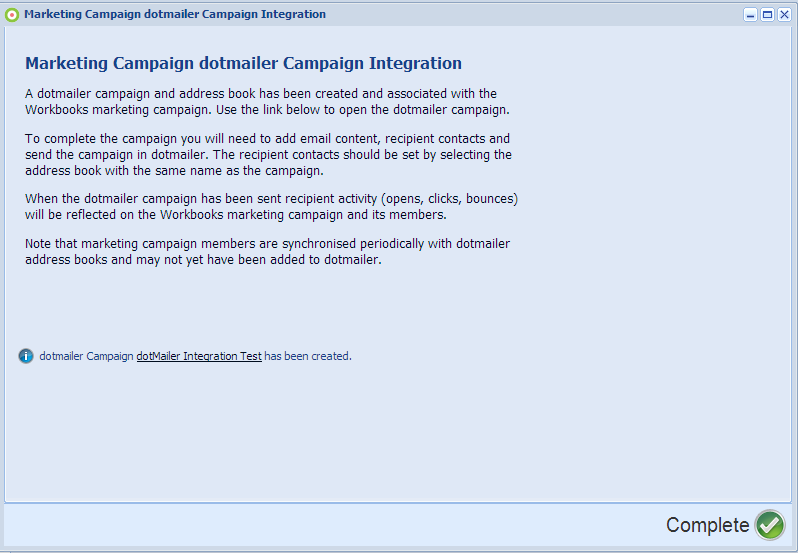
Once you see the above screen, you can click the information text which will ask you to sign in to DotDigital. You can then add content such as images, links and text to your Campaign using the DotDigital Wizard. Within Workbooks, simply click Complete.
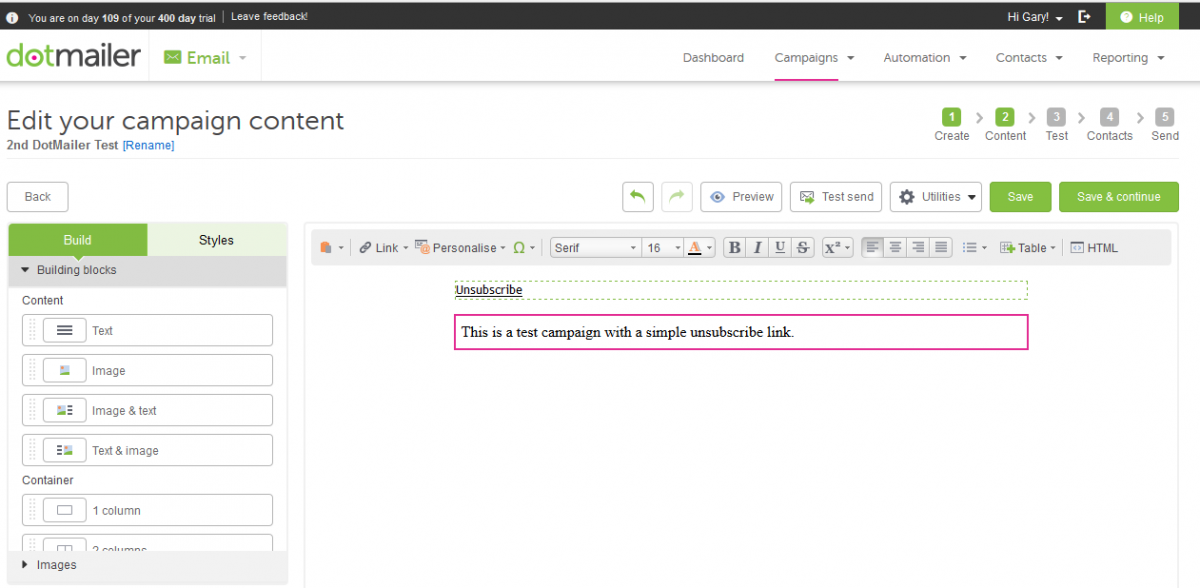
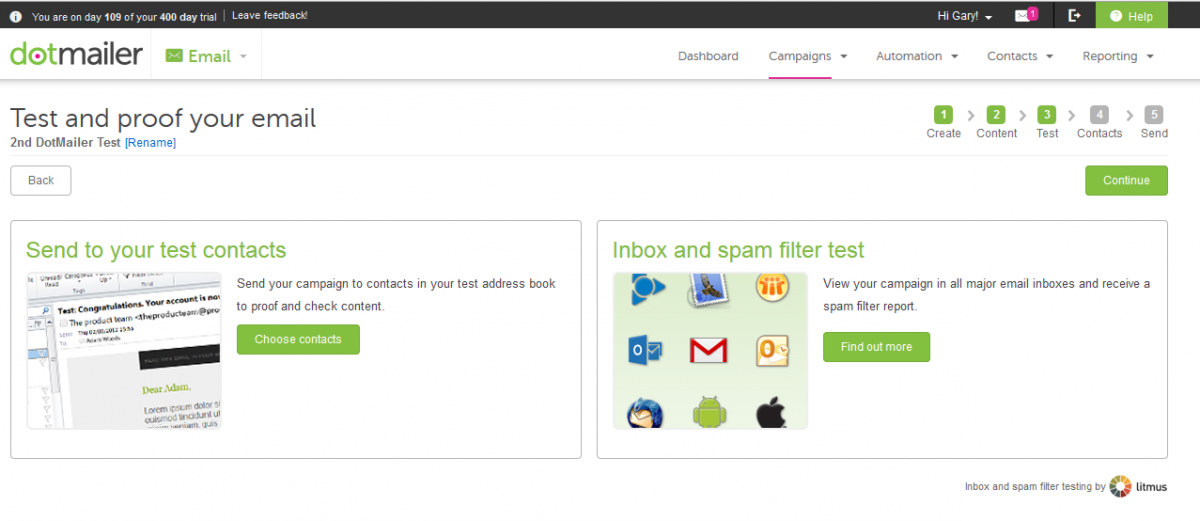
When you are happy with the look and feel of your Campaign in DotDigital, click Save & Continue. You then have the option to send out a test email. Click Continue to skip this if you wish but our recommendation is always to test first to ensure you are happy with the results.
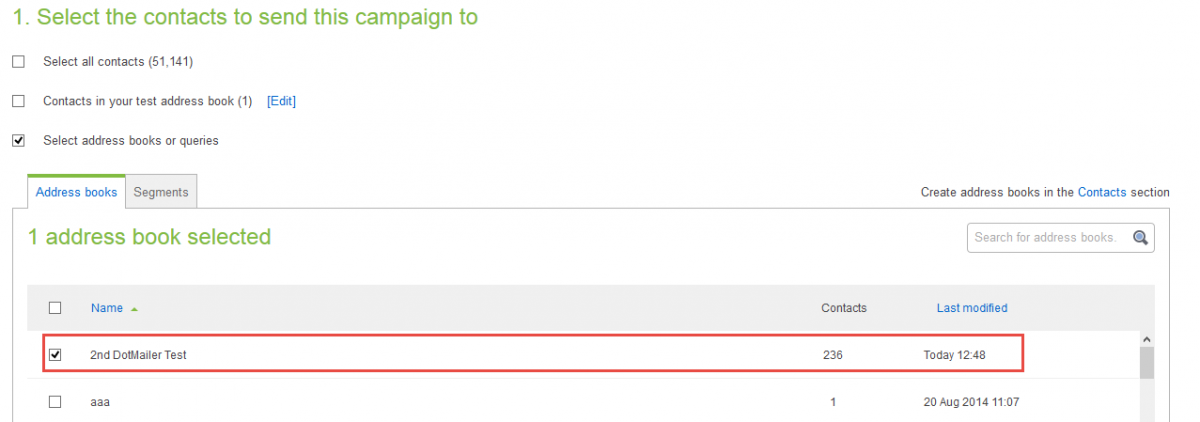
Next, add some contacts from an existing Address Book or select all contacts. You should only ideally select the Address Book with the same name as the campaign that you are sending out to avoid discrepancies in figures against your Workbooks Marketing Campaign record.
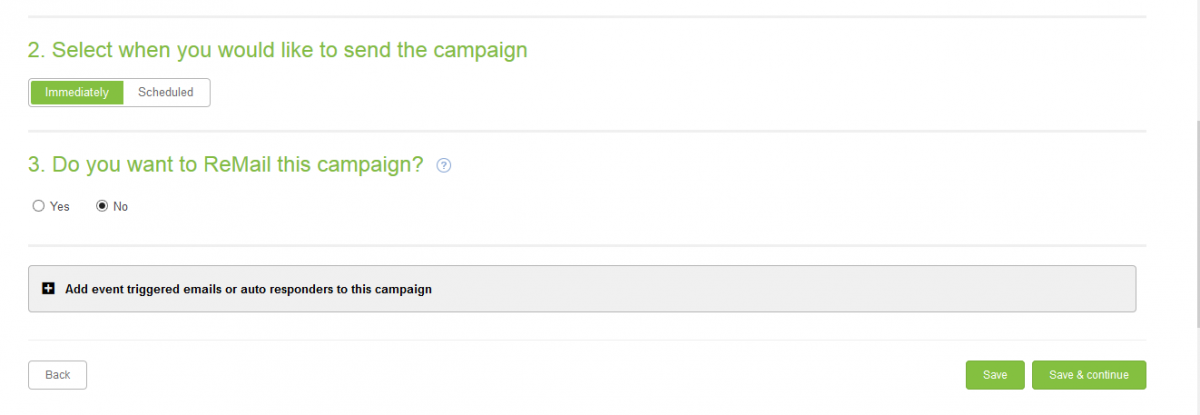
On the same screen, you can also choose to schedule the campaign or send it immediately. You can also use a DotDigital function of Triggers to set up a Campaign workflow. Click Save & Continue.
You’ll then see a confirmation screen where you can make final changes to the campaign subject, reply email address and also the HTML/Plain Text content before choosing to send.
Step 5a: Reporting on the Campaign Results in DotDigital
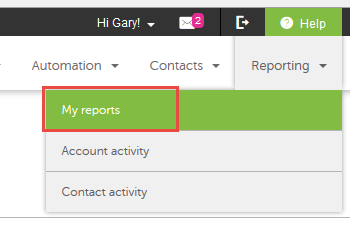
Once the Campaign is active, DotDigital will collect the resulting data which is then in turn pushed back into Workbooks, see Step 6 for more information. Within DotDigital, you can see results of your campaign by clicking Reporting -> My reports.
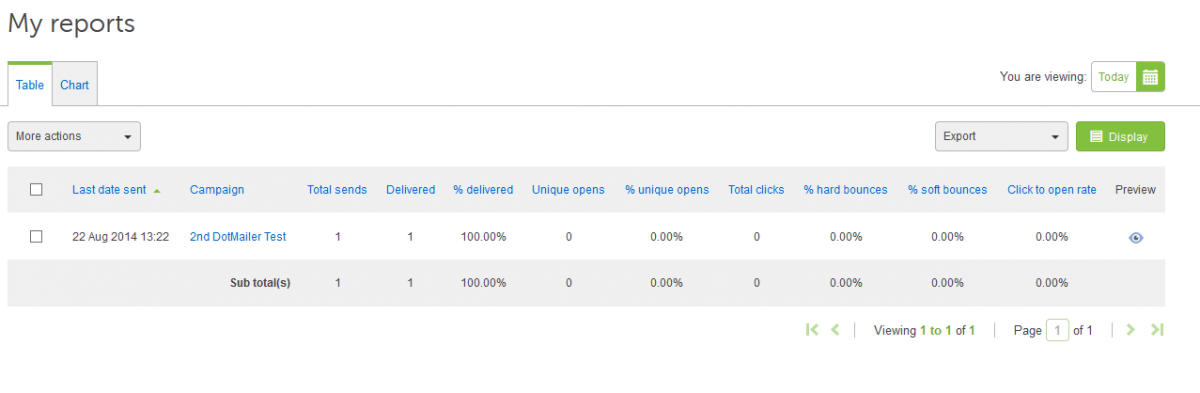
NOTE: It is recommended that you view this information on the Marketing Campaign record in Workbooks though as it easier to understand. See Step 5b for more information.
Step 5b: Viewing Workbooks Campaign Summary
Once a campaign has started to collect data in DotDigital and this synchronises over to Workbooks, you can view the information collected for each individual campaign within Workbooks. Open up the Marketing Campaign and expand the dotmailer section, to reveal the data that has been synced:
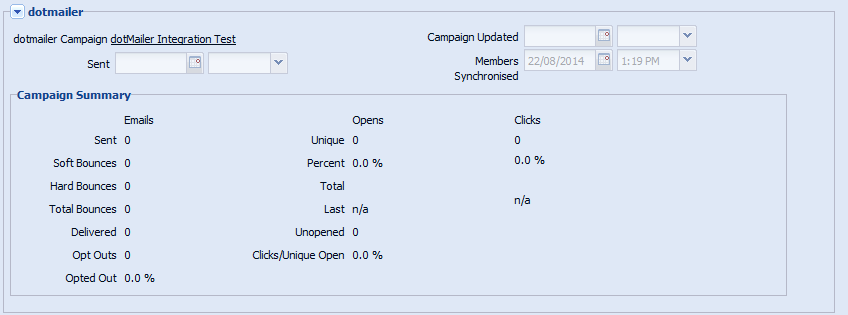
In the screenshot above, you can see that the figures are all showing 0. This is because the script that runs to pull information back into Workbooks has not yet run.
It’s also possible to see the summary for each individual target by opening the Members tab. When first opened, the view shows basic information about the member. However you can configure the grid to display columns showing details such as Email Opens, Email Clicks, Emails Soft Bounced and so on:

Step 6: Synchronising DotDigial Results into Workbooks
Data that is captured in DotDigital such as the number of emails opens, number of emails that have bounced and the number of people that have clicked on the links within your emails is automatically synced back to Workbooks as part of the integration so that all of your information is in one central location.
The frequency of this process is defaulted to run every 4 hours but this can be changed to meet your requirements as necessary. To do this navigate to Start -> Configuration -> Automation -> Processes and open a process called a dotmailer activity to Workbooks.
Change the Run picklist to either Hourly, Frequently, Daily or Monthly. For the first two options, you’ll need to enter a value into the Recur every field whereas for Daily or Monthly you simply need to choose a time from the picklist. From within this window, you can manually run a synchronisation from DotDigital to Workbooks by clicking the Run Now button.
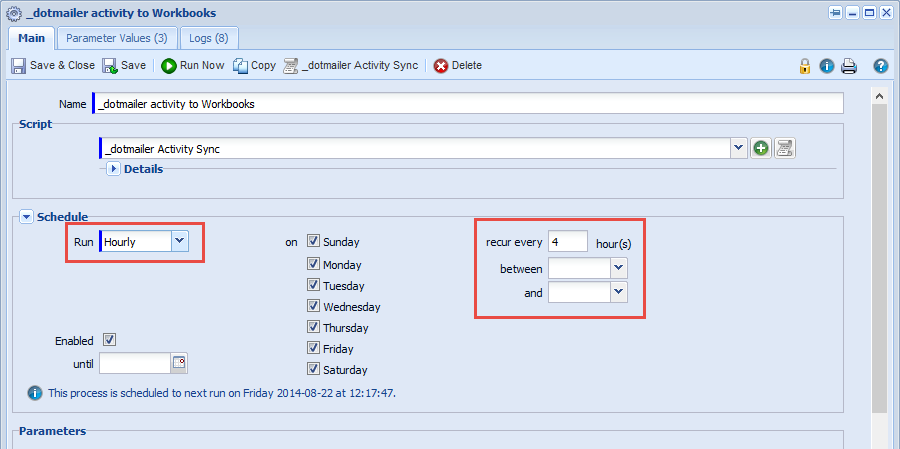
Remember to click Save & Close when you are happy with the settings.
Maintaining the DotDigital processes
As mentioned on this page, there are 4 processes which make up the DotDigital Integration with Workbooks. There is also information with regards to managing these processes, here, which details how to handle users that have left the company, changing the frequency of the Scheduled Process and so on.