


Creating relationships with Dynamic Linked Items (DLIs)
Detailed guidance on how to use DLI’s to create relationships, including an example of capturing the Reseller on Opportunity records.
Prerequisite Knowledge: This page explains how to use a Custom Field with the Dynamic Linked Item (DLI) data type to automatically create a relationship. You will need to understand DLI Custom Fields to make full use of this information and the example.
NOTE: Dynamic Linked Items are not supported within the current mobile client. Consequently DLIs that appear within the desktop UI will not appear when viewed using the mobile client.
Using a Dynamic Linked Item (DLI) to create a relationship
Tip
You can quickly locate the Role / Relationship picklists by using a Filter. Filter for Name | Contains | role.
The default Workbooks Opportunity record includes a field named Prospective customer. This field allows the selection of a Person or Organisation record. When the record is saved Workbooks automatically creates a relationship between the Opportunity and the record selected as being the prospective customer. You can create custom fields with similar functionality and results, using Dynamic Linked Items (DLIs).
Dynamic Linked Item (DLI) data type Custom Fields include the option (within the Advanced Options section), to Create Relationships. This option builds a relationship between the record you’re viewing and the record you select in a Selection List (dropdown list of records). This relationship will be displayed under the relevant tab.
NOTE: There are a few relationships that work slightly differently to the example outlined below.
1 – If the underlying DLI report is based on the “People and Organisations” record type, you cannot create a relationship when you select that report in a DLI custom field. You can still use the DLI to select a Person or Organisation, it just doesn’t allow you to create a relationship because the system doesn’t know if you’ve selected a person or an organisation as the report can return both types of record.
2 – If the DLI Custom Field is added to a Line Item, eg, a Quotation Line Item, a relationship will not be created. This is because a Line Item doesn’t have a relationship with its header record. A Line Item can be one of many items on a Quotation. They are linked, by ids, but there is not a relationship.
3 – The list of options available on the Add Relationship button of some screens are not yet customisable, eg, Person record > People tab > Add Relationship split button. The same applies to the Person > Organisations tab, Organisation > People tab, and the Organisation > Organisations tab.
Example:
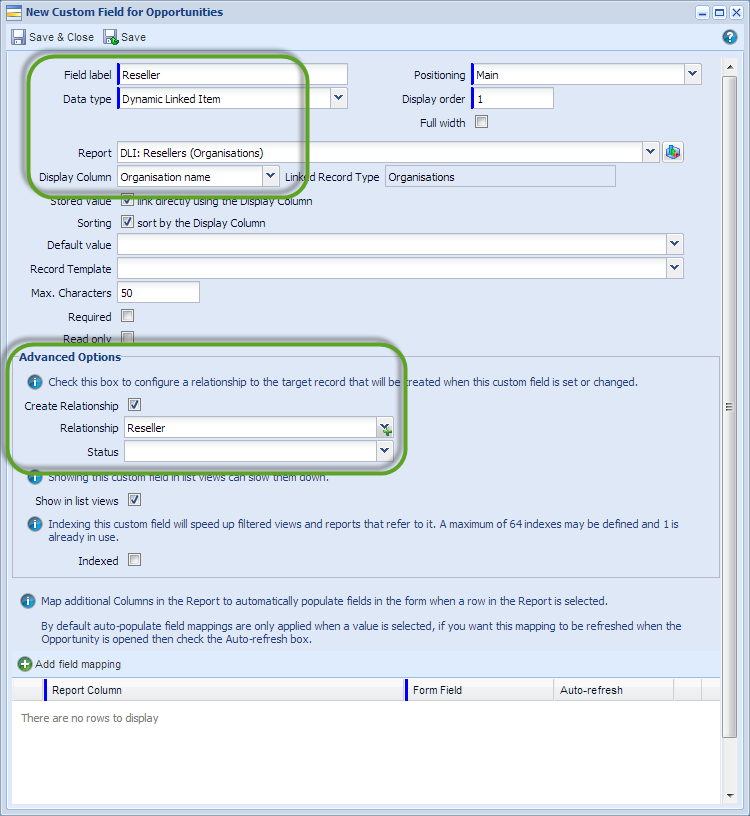
Scenario: You want to add a custom field on Opportunity records to capture the reseller. You are using a DLI Custom Field called Reseller that makes use of the Create Relationship option. The DLI will return a list of Organisations based on a report that only returns Organisations with a Category value set as Reseller.
Add a DLI custom field generated from an Organisation report. Within the Advanced Options panel ensure you tick the checkbox nex to Create Relationship and use the dropdown picklist next to Relationship to specify the sort of relationship you want to create. You can also set a default status.
(Click to enlarge images.)
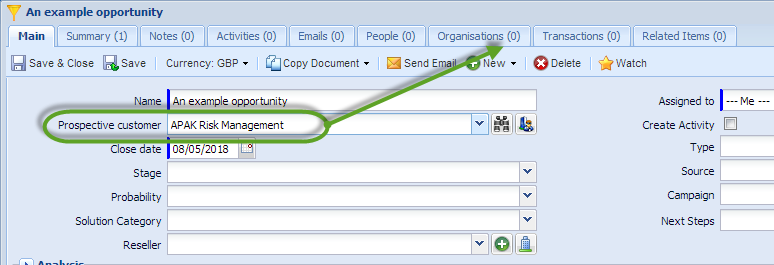
Before we look at how the new Reseller field works, let’s take a look at the standard Workbooks field, Prospective customer.
In this image we see a prospective customer has been selected, but the Opportunity record is yet to be saved…
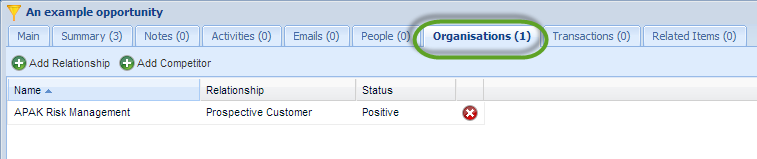
… after the record has been saved you’ll see that a relationship has been automatically created:
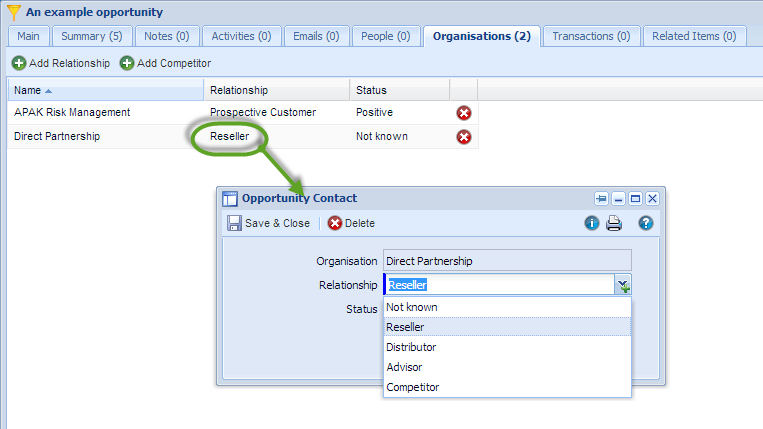
The following image shows the newly created Reseller field. An Organisation has been selected and the Opportunity has already been saved. Notice that the Organisations tab count has increased to 2.

Click the Organisations tab to see all the organisation relationships.
In this example we’re happy with the relationship being set to Reseller, but clicking the relationship allows the Relationship value to be changed.
NOTE: Relationships are maintained in Configuration > Customisation > Picklists.