


GatorWorkflow
What’s a Workflow?
Workflows allow you to take your audience on a journey and send different communications at different times depending on when or if different conditions are met. For example, you send an audience group an email, a condition is set up telling the Workflow to move those who have opened the email along one path and those who didn’t open it along a different path. Now your audience group has split and journeyed along different paths, being sent different follow up emails and exiting at different stages.
Workflow also provides you with the ability to save and store values for contacts depending on how a member fills in a form or submits any personal information. For example, a user may be presented with different choices of sports newsletter to select in an email. If they click on a certain type, then a field in their contact record can be populated with information regarding that choice as their preferred sport.
Why use a Workflow?
Spotler has a simple drag and drop editor that allows you to create links between email campaigns and audience groups within Spotler. It allows you to:
- Manage the sending of multiple different emails;
- Send to varying audience groups;
- Create a journey for members to travel along;
- Save time creating numerous rules for individual groups;
- Create long-term flows for long-term campaigns;
- Have an easy-to-follow visual guide for your campaign activity.
Steps to set up your Workflow
Setting up a Workflow involves some actions in Workbooks, followed by actions in Spotler. These are:
- Build a report in Workbooks to identify your initial target audience.
- Create a Workbooks Mailing List, which is:
- Auto-refreshing;
- ‘Syncable’ with Spotler.
- Set up a data sync between Spotler and Workbooks (with the same name as your Workbooks Mailing List).
- Create your Spotler campaign(s).
- Create your Spotler Workflow.
- Test your Workflow.
- Make your Workflow live.
Follow the steps below or watch this video to learn more.
Step 1 – Build the Report
The first step is to build the Report that identifies your initial target audience. Exactly who you want to enter your Workflow will depend on the journey that you want to take People or Leads on so there are many different potential starting points for your Reports. For the purposes of these instructions, we will assume that you know how to build reports that include details on the correct People or Leads. If not, please visit our Reporting page here or watch the videos available here.
Step 2 – Create a Workbooks Mailing List
Now you need to create a Mailing List with members populated from the Report you’ve created by navigating to Start > Marketing > Mailing Lists > New Mailing List.
Give your Mailing List a name and select Create a Dynamic Mailing List.
Use the dropdowns next to Report, View and Column to identify who you want to add to your Mailing List and click Add Members. If you want to add members from additional reports, you can add those later.
On the Main tab tick the checkbox next to Auto Refresh and select GatorMail from the dropdown next to Synchronise with.

NOTE: When you create your Data Sync in Spotler you need to give it the same name as your Mailing List in Workbooks so DO NOT change the name of this Mailing List once you have linked the two things together.
If you want to add Members from other reports you can do so using the Reports tab, otherwise click Save & Close.
Step 3 – Set up a Data Sync
The text below gives guidance on setting up a Data Sync. Full details on creating a Data Sync can be found here.
- Within Spotler GatorMail, select Tools from the left-hand menu > Data Sync > Add New. Give your sync the same name as you gave your Workbooks Mailing List (we’d recommend copying and pasting the name to avoid any mistakes).
- Give the sync a description so that later it’s clear what the purpose is and click Create New. This will open a screen with 3 tabs (Detail, Data and Mappings). The Detail tab will be open. The Name and Description fields will have inherited the text you’ve already entered. The Connector field will have defaulted to Workbooks. The schedule will default to Every day but you can use the dropdown to select a different schedule if you prefer. Leave the tick in the checkbox next to Add to Group. You do not need to select a group as a new one will automatically be created for you.
- Click to open the Data tab and use the dropdown under Data to select the Mailing List you created in Workbooks. If you don’t see it in the list, click the Reload mailing lists button and try again. If you still don’t see it, go back into Workbooks and double-check that you made the Mailing List ‘syncable’ with Workbooks.
- You shouldn’t need to change any Mappings (as that will change the mappings used across Workbooks/Spotler), so just click Save.
- When the screen reloads you’ll see a button at the top called Change State. Click this, select the Enabled option next to State and click Change State. This will be queued and you’ll see the Sync State button change to a green circle when it’s complete.
Step 4 – Create your Spotler Campaign(s)
These instructions assume you’re already familiar with creating a Spotler Campaign and the relevant emails using GatorCreator. More information on setting up Campaigns within Spotler can be found here. When setting up your Campaign remember these 3 points:
- Set up a Traditional Campaign NOT a Quick Campaign.
- Give your Campaign a type of Follow Up/Workflow Campaign.
- Give your Campaign an Action Type of Static.
Step 5 – Create your Spotler Workflow
Within Spotler GatorWorkflow you have 3 options when creating a new Workflow:
- Create a Workflow – where you start with a blank canvas.
- Copy a Workflow – where you start with an existing Workflow and amend as required.
- Copy from a Template – where you can select from some pre-built templates and again, amend as required.
NOTE: A blue bar at the top of the screen will show you how many Workflows you have licensed, which is the maximum number you can have published at any one time. If you want to exceed that number you’ll need to disable an existing Workflow or request additional Workflow licences.
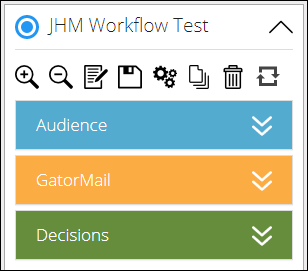
You could build many different Workflows, ranging from something very simple to something complex but the drag and drop editor makes creating a Workflow relatively straightforward. It’s important to remember that every Workflow must have at least one entry and one exit point. That said, try to reduce the number of exit stages, if possible. The Workflow menu is made up of 3 stage types to identify members, send communications and deal with decisions and data. Clicking on each of these types will open the stage type menu.
REMEMBER: Workflows DO NOT auto save so click the floppy disk symbol to save your Workflow as you go.
For details on how to build your Workflow once you have created the original audience group in Workbooks, click here.
Step 6 – Test your Workflow
We recommend that you test every element of each Workflow you create before you make it live, even if you’re copying an existing Workflow or starting with a template.
Testing allows you to check that the right email is being sent at the right time and you can advance members through Wait Periods and other stages manually so that you don’t have to wait in real-time.
When testing, be prepared to take the appropriate actions at each stage to show the flow of data through the end-to-end Workflow. This may involve repeating Workflow tests so that you can simulate different journeys. You can do this by removing the test person from the members tab. This will remove them from all stages and allow them to start again at the beginning of the Workflow. More details on testing Workflows can be found here.
Step 7 – Make your Workflow live
As soon as you publish your Workflow it will become active so make sure you’ve tested all scenarios first. To publish your Workflow select the Edit Settings button, select Live from the dropdown that appears and click OK. If publishing has been successful you’ll see a confirmation dialogue box. If the Workflow cannot be published, you’ll see a Failed to Publish Workflow message giving information on the problem(s). More information on publishing your Workflow is available here. Once your Workflow is live you can manually interact with member records by selecting the relevant person from the Members tab. Available options are:
- Remove Member – removes the member from the Workflow, permanently.
- Remove Member (allowing re-entry) – removes the member from the Workflow. Should the member meet Workflow entry requirements in the future, they will rejoin at that entry point.
- Pause Member – pause the member at the current stage. You can resume them at anytime in the future.
- Manage Stored Values – this will show you all of the Stored Values for the member within the current Workflow. You are able to edit these at this point should you wish.