Using the Outlook Connector
Detailed guidance on how to use the Outlook Connector, including sharing items, resolving conflicts, amending the synchronisation frequency etc.
The Workbooks Outlook Connector is simple to use and there are lots of features that may not be immediately obvious after first installation. Below, you will find our usage video which runs through how to use the Connector and its functionality. If you have not yet installed the Outlook Connector, you can find instructions on how to do this in our Outlook Connector Installation guide.
Sharing Outlook records with Workbooks
Once the Outlook Connector is installed, items in Outlook have one of the following states:
- Native: these are items which have been created in Outlook, and are not compatible to be shared with Workbooks. These items are identifiable in the contact list view within Outlook by the standard contact card icon.
- Unshared: these are items which have been converted so that they can then be shared with Workbooks, however have yet to be shared. These items are identifiable in contact list views within Outlook as they use a greyed out Workbooks People icon.
- Shared: these are items which have been converted and shared with Workbooks, and will therefore appear both in your Outlook and Workbooks. These items are identifiable in contact list views within Outlook as they use the Workbooks People icon.
Newly created Outlook items can be automatically converted and synced to Workbooks upon creation, this is configured within the Outlook Connector’s Settings.
Converting Outlook Contacts
In Outlook Contacts can be converted to sync with Workbooks after the Outlook Connector has been installed. This is done by accessing the Contacts page within Outlook and highlighting a Contact, once a contact has been selected, you will be able to choose whether the Contact needs to be synced to Outlook or Workbooks.
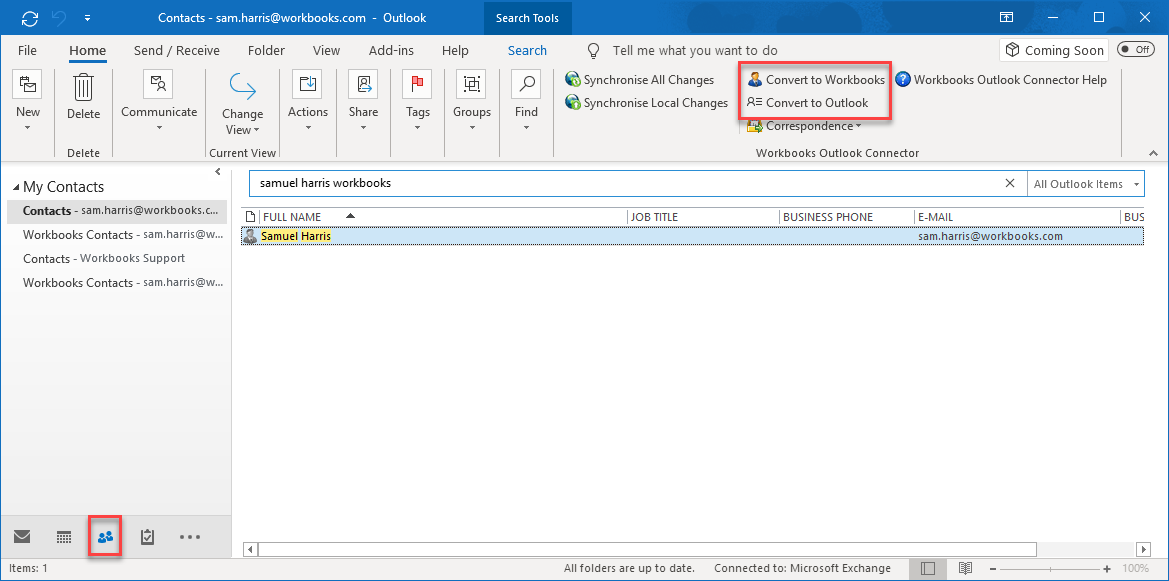
You will need to select Convert to Workbooks and then open the Contact record, you will then see a black banner across the top of the Contact record.
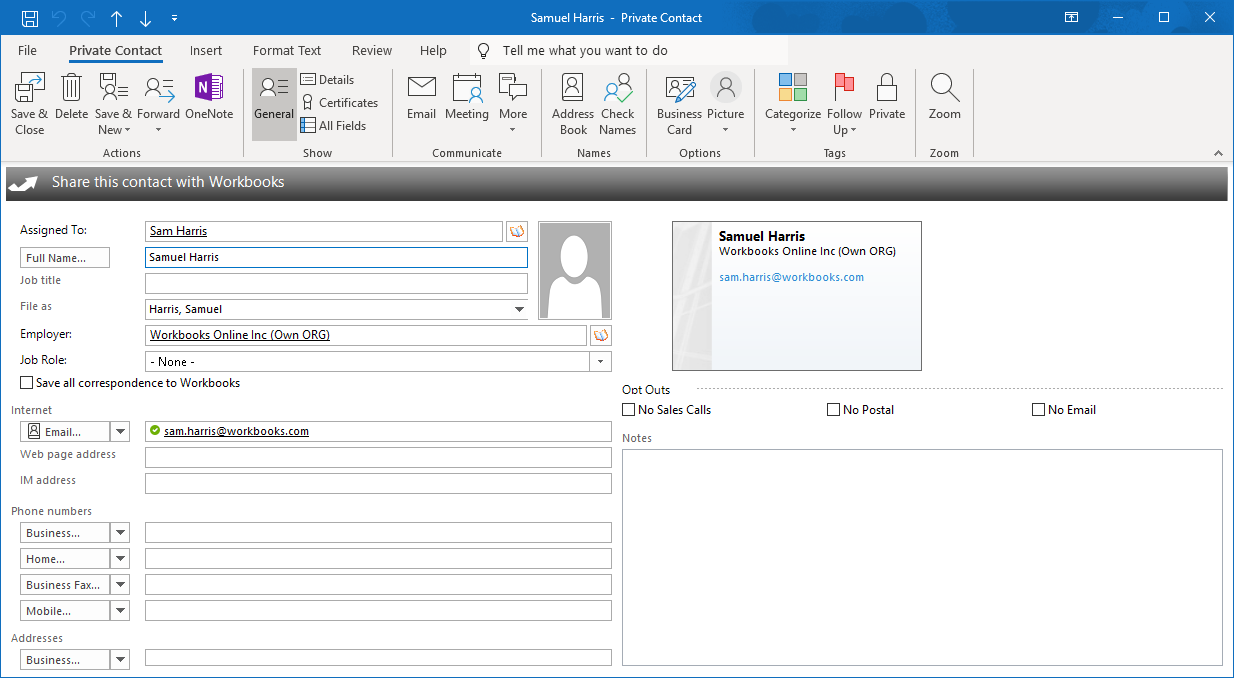
Selecting this banner will change the colour from black to blue, this means that the Record will be sent to Workbooks when a sync next runs.
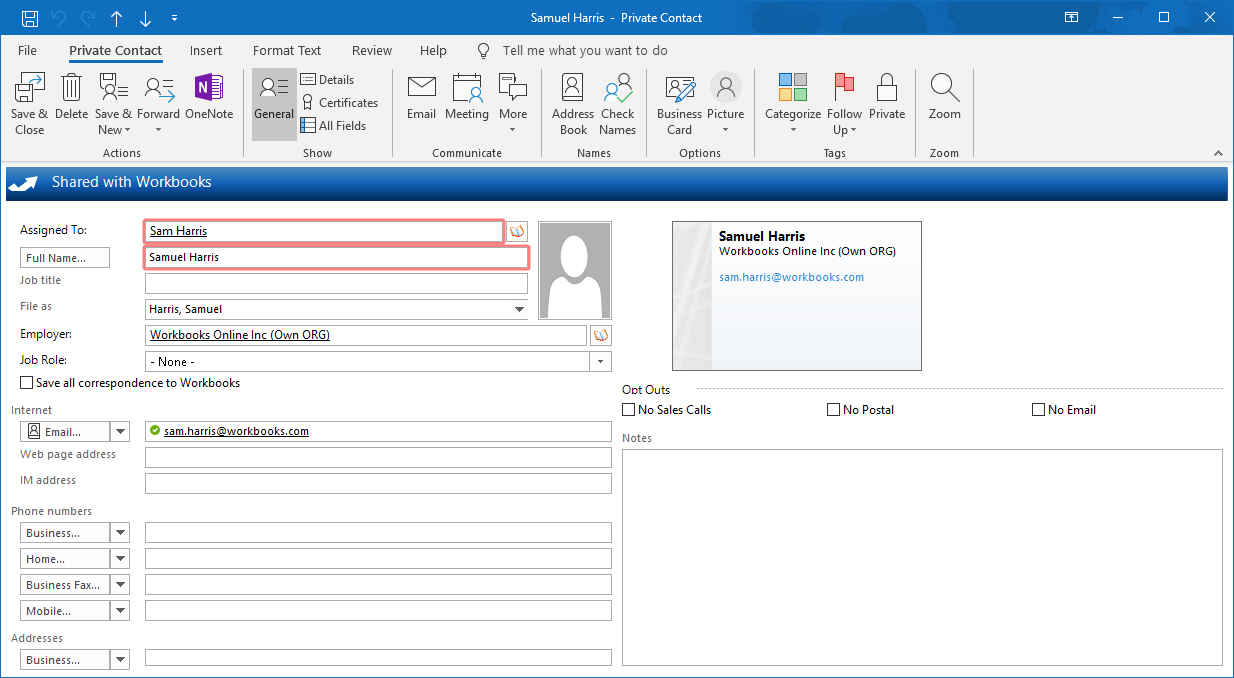
From here you can also change who the Record will be Assigned to when it is created in Workbooks, to do this you can either type directly into the Assigned To Field or select the book icon. This will bring up a list of all active Users within the database.
Note: Filters can be applied in order to quickly find the relevant user.
This same process can then be applied to set the Employer on the Person, this will link the Person to the selected Organisation Record within Workbooks.
Once you have made the changes be sure to Save & Close the Contact Record, otherwise these changes will not sync to Workbooks.
Sharing Meetings & Emails with Workbooks
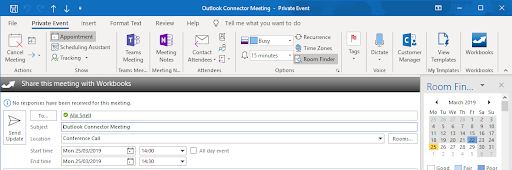
Find the meeting that you wish to synchronise in your Outlook calendar and open it, you will see a black banner across the top of the meeting.
To sync an Email you can open an email from either your inbox or sent items and you will see a black banner across the top of the email body.
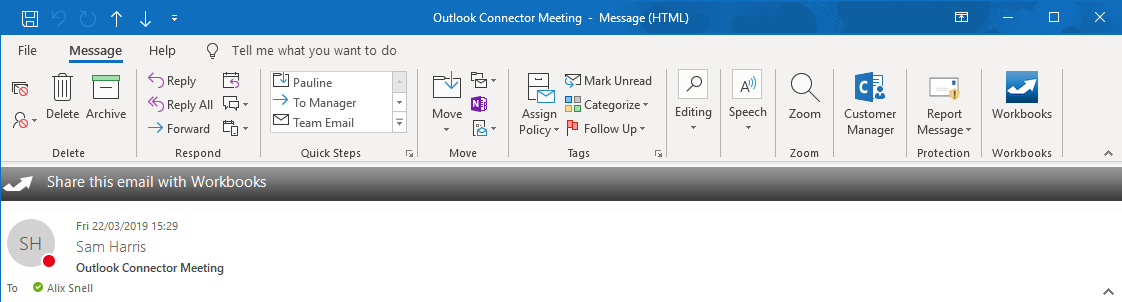
Clicking on the banner will change the colour from black to blue, meaning that the meeting or Email will be synced to Workbooks when the sync next runs.
Correspondence Manager
This feature of the Workbooks Outlook Connector has been designed to make the task of syncing emails with Workbooks against contact records easier for you. This functionality allows you to automatically sync emails from specific people in your Outlook Contacts meaning that emails do not need to be manually synced saving you time and the need to remember a manual sync..
To set this up you will need to go to the Contacts view in Outlook, select a contact that has already been shared with Workbooks in the Workbooks Outlook Connector section you will be able to select the Correspondence drop down. From this list select Save Correspondence this means that any email sent or received from this email address will be synced with Workbooks automatically.
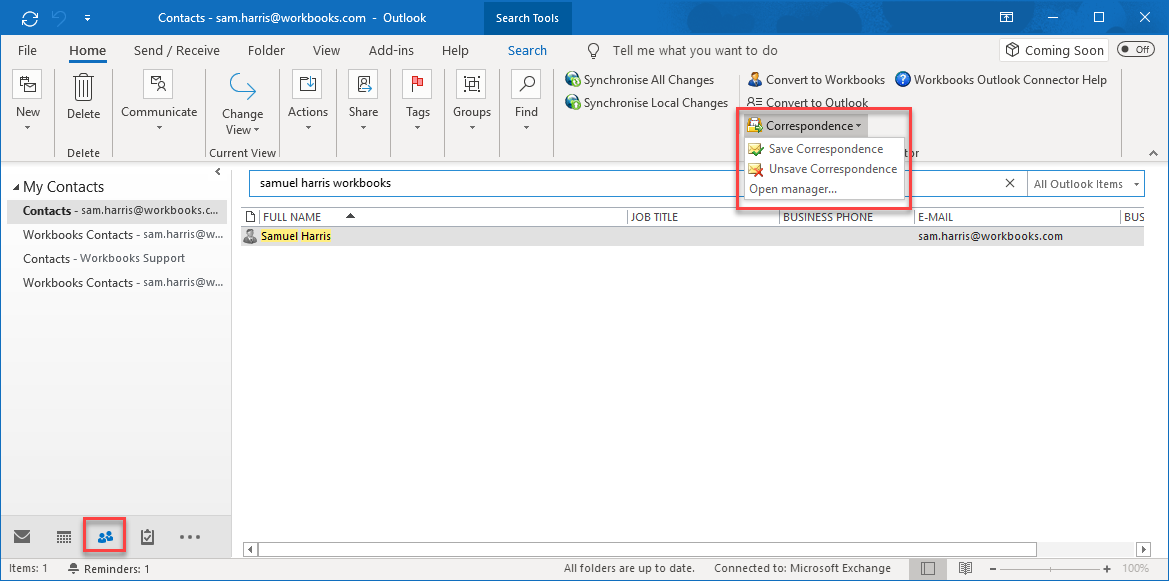
You can also add or remove contacts using the Correspondence Manager, to do this select Open manager… this will open a new dialogue box that will allow you to change the status of contacts as to whether you are saving their correspondence or not.
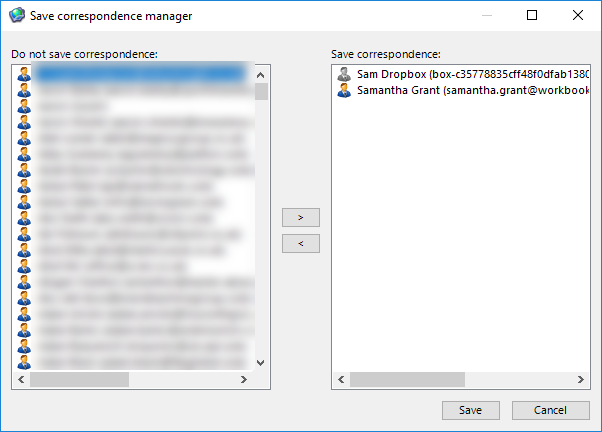
Contacts can only be amended individually by using the central arrows to change their respective lists.
Relating Emails to other records in Workbooks
By default when sharing an email with the Outlook Connector it will be added to any Person or Lead Record with the sender’s or recipients’ email addresses. It is also possible to relate the Email to specific records such as Cases, Organisations or Opportunities.
To do this you will first need to ensure that the email has been set to be shared with Workbooks, this will mean that the Connector banner is blue. Once in this state a new window will appear at the bottom of the email.
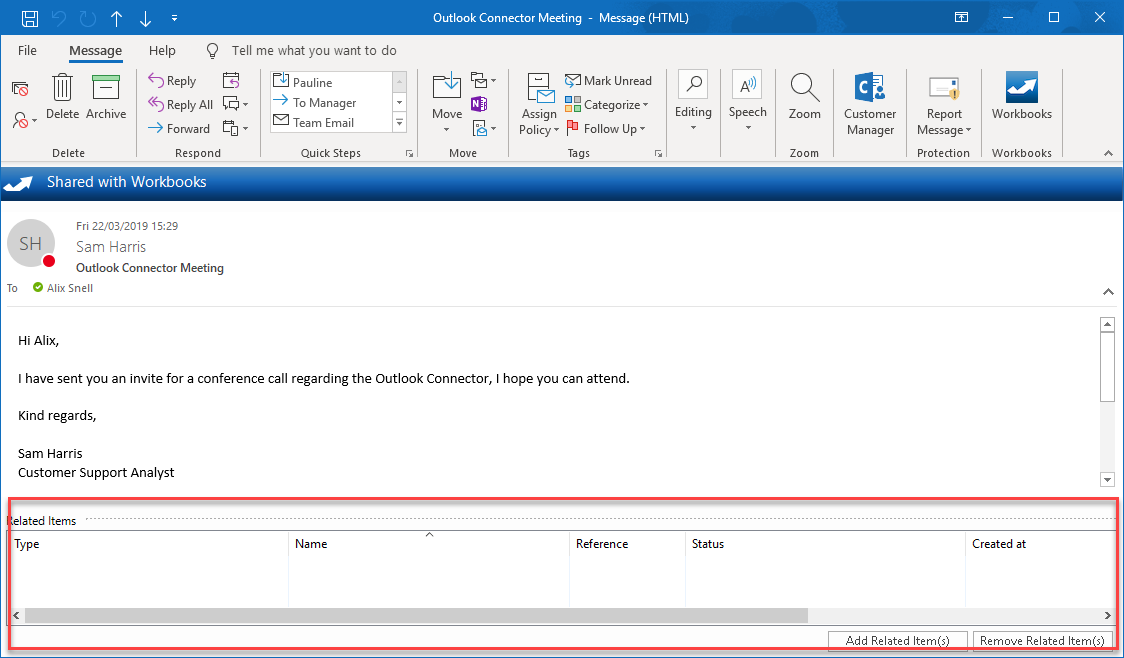
From this new window you will be able to add or remove relationships between this email and other records.
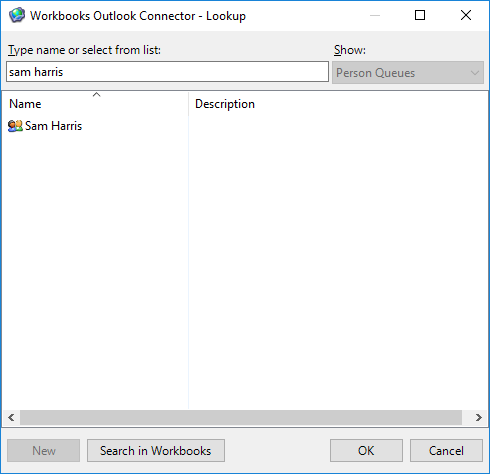
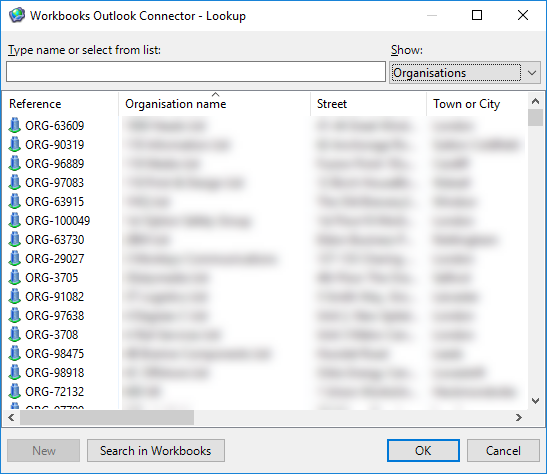
To relate items, click the Add Related Item(s) button and choose the relevant records. By default you’ll see a list of Organisations but you can use the dropdown under Show to access records of different types. The Workbooks Outlook Connector allows you to look up records that you may not necessarily decide to synchronise down from Workbooks with your filter settings.
The feature allows you to relate an activity or email to a record that you may be working on for a specific time period and you do not wish to synchronise this down permanently with other records as defined in your filter settings.
From this view you can either select a record from the list, or search for the record’s name in the search bar. If you cannot find the record in this lookup use the Search in Workbooks button to lookup the information in Workbooks.

Synchronising the Outlook Connector
Once you’ve installed the Workbooks Outlook Connector the synchronisation will run in the background at the frequency you applied when working through the First Run Assistant.
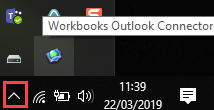
It is possible to sync the Outlook Connector at any time through the Connector Menu. To force a synchronisation, click on the Workbooks Outlook Connector icon in your system tray at the bottom right of your screen.
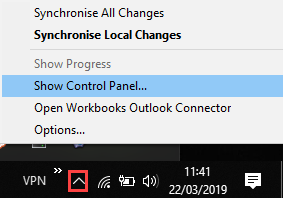
When you right click on the icon, you will be able to select one of the following options.
Synchronise All Changes: This starts a two-way sync between Workbooks and Outlook updating all records in both systems and sending them to the other.
Synchronise Local Changes: This starts a one-way sync with all of your Outlook updates to Workbooks.
Show Progress: This is only accessible when sync is in progress, you can click this button to show a dialog box to review the progress.
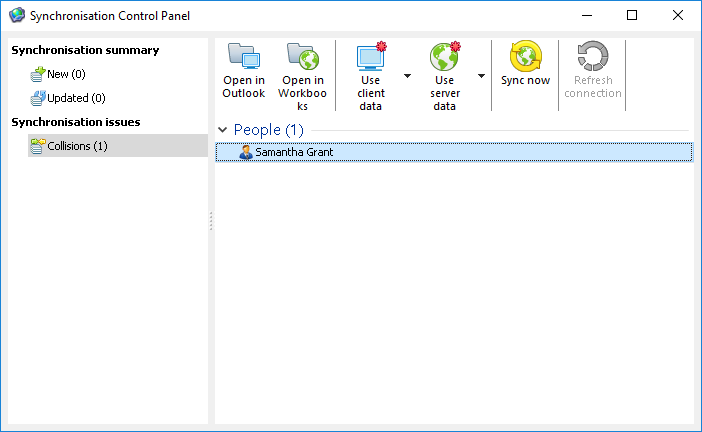
Accessing the Outlook Connector Control Panel
The Outlook Connector Control Panel shows you a summary of your most recent sync. This includes, the number of new records that have been created, the number of records updated as well as any issues encountered during the synchronisation.
To access the Control Panel click on the Workbooks Outlook Connector icon in your system tray at the bottom right of your screen.
When you right click on the icon, you will be able to select Show Control Panel…
This will open a new window where you can review your sync and open any records that encountered issues.