


Setting up Public/Private Activity creation
Create Public/Private Activities to store Case interactions visible in the Case Portal
NOTE: This script can be used as a standalone feature without the Case Portal. If you plan to do so, you can create the Custom Fields highlighted on this page manually without installing the Case Portal plugin.
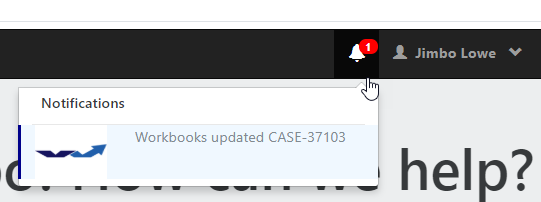
A Script Library script is available which can be configured as an On-Save button process to store an Activity for an action taken against a Case – this process will also drive the Case Portal notification area shown above.
Under Advanced Features within the Case Portal setup, the setting Show Portal Notifications in Portal controls a feature that allows you switch this feature on. Our own internal Support team use this method, and we find it is currently the most efficient way to work when dealing will a small – medium volume of Cases. The Activities created can also then drive automated emails to the Case’s Primary Contact and/or drive Notifications that appear in a “Facebook-like” notification area within the Case Portal navigation bar.
If this setting is switched On, an additional icon will be shown within the Portal navigation bar when an user logs into the Portal. An additional setting is shown when turning this feature on. Set the Portal Notifications Logo URL, to a publicly accessible URL of an image you wish to use on each notification that is generated as shown below. We’d recommend uploading the image to the Upload Library (Marketing > Upload Library) and using the “External URL” provided for this setting.
The first time this feature is switched on, the Case Portal plugin also create five new fields on your Case record that are hidden by default. These are:
- Task Type (Picklist) – Next Steps, Notes, Resolution, Phone call
- Activity Sub Type (Picklist) – Public or Private options
- Next Steps Due (Date)
- Task Description (Rich Text)
- First Response At (DateTime)
The “Activity Types” picklist will also have the following values added automatically – “Next Steps”, “Notes”, “Resolution”, “Phone call”
Step 1: Create a Recent Activities Report Cell
Using a Report field, you can display the most recent Activities that have been created against a Case. This will allow anyone viewing the Case to see exactly what has happened in reverse chronological order (most recent first) without having to navigate away from the Main tab of the Case record.
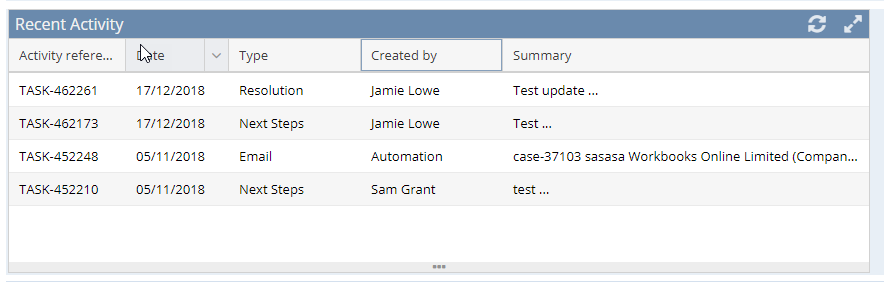
To begin with, you will need to build a Report prior to creating this field. We have provided a Template Report to get you started but of course you can add further details as required. Click Start > New > Report > Create a Report from a template Report and choose “Cases and their recent Activities“.
Next – go to Configuration > Customisation > Record Types > Cases. Create a new Custom Field of type “Report” and call it “Recent Activity” and select the report that you just created. Add a constraint as follows (this will ensure that only the Activities for that Case are show in the grid): Save the field. In Step 3, we will place this field in the correct location on our Form Layout.

Step 2: Configure an On Save Button Process
Under “Form Layouts” tab of the Case record type, choose one of your Form Layouts that you would like to apply this script to. Under the Automation tab, click “New Process Button” and then fill out the following information:
- Script Name: Create Activities from Case
- Script Location: Script Library
- Script: Create Activities from Case
- Enable: True (tick)
- Run As: Current User
- Position: On Save
- Show Confirmation Message: False (un-tick)
Click Save and a new tab will appear called “Parameter Values”. There are two parameters to consider:

- case_activity_sub_type_val: Set this parameter to “Public” or “Private” if you want the script to always create an Activity of a certain Sub Type. On most setups, you will probably want the ability to create both. However, on some occasions, you have certain form layouts where you wish to log Activities for actions taken that are always Private (Internal Notes) and are not visible on the Case Portal.
- enable_notifications_for_portal: If you are using the Case Portal, you must set this parameter to “true”, otherwise the Portal Notifications area will not work correctly.
- email_default_sender: This parameter must be configured to the email address you intend to send invites to users with.
Step 3: Show Custom Fields
On your Form Layout, under the “Sections” tab, create a new one column section called “Case Notes“. Set the parent section to “Form” and place in the relevant place on your layout. Create a 2 column section called “Case Notes Sub Section“. Set the parent section of this 2nd section, to “Case Notes“.
From here, you can now place the fields described at the start of this post:
- Task Type (Picklist) – Next Steps, Notes, Resolution, Phone call
- Activity Sub Type (Picklist) – Public or Private options
- Next Steps Due (Date)
- Task Description (Rich Text)
- First Response At (Date Time)
We’d recommend the following setup as this works well for our team (the First Response At field, usually remains hidden as it can be used as part of an SLA workflow and doesn’t need to be populated manually):
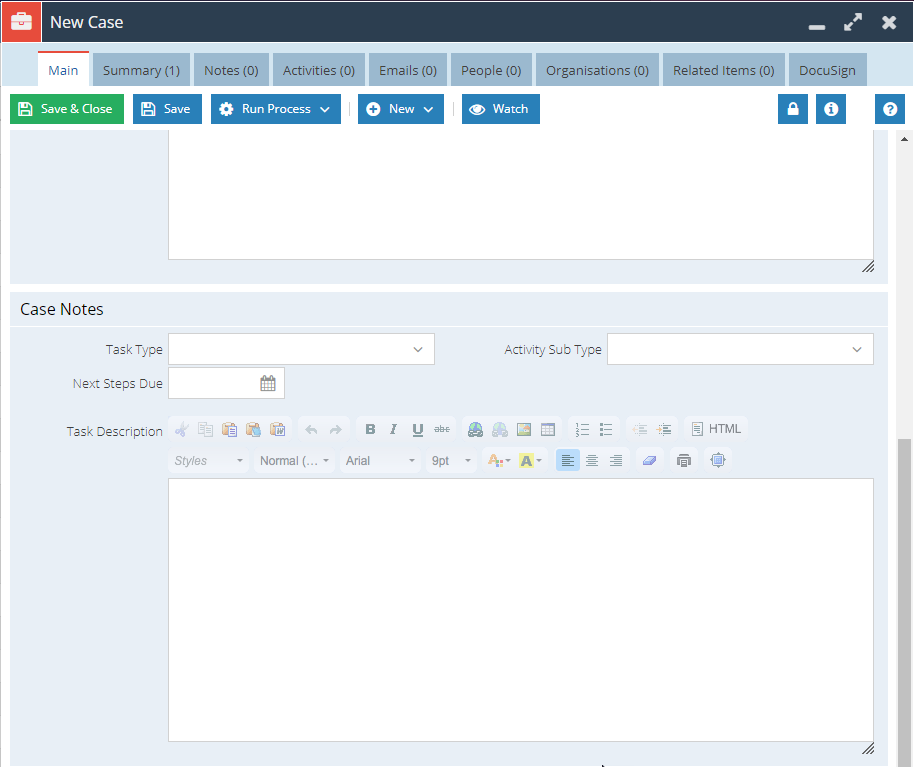
As a final step, place the Report field created in Step 1, either above or below the “Case Notes” section.