Xero payments to Workbooks Tasks
Use Zapier to create Tasks in Workbooks when a payment is received in Xero to help you keep track of the status of your Invoices
What is Xero?
Xero is a cloud-based Accounting and Bookkeeping platform used to help you keep track of your company’s cashflow online.
What does this Zap do?
Every time you receive a payment in Xero, the Zap will create a Task that contains information such as when the payment was made, how much was paid and which Invoice it relates to. You can then use this information to update your Invoices in Workbooks accordingly.
Setting up the Zap
A Zap Template called ‘Create tasks in Workbooks CRM when payments have been received in Xero’ can be used to speed up the process of setting this up. It selects the correct Trigger and Action for you, and sets up a few field mappings.
You will be taken through the Zap wizard as normal but you will need to tell Zapier which accounts to connect to.
The Zap template sets up the following field mappings for you, but these can be amended to suit your business requirements:
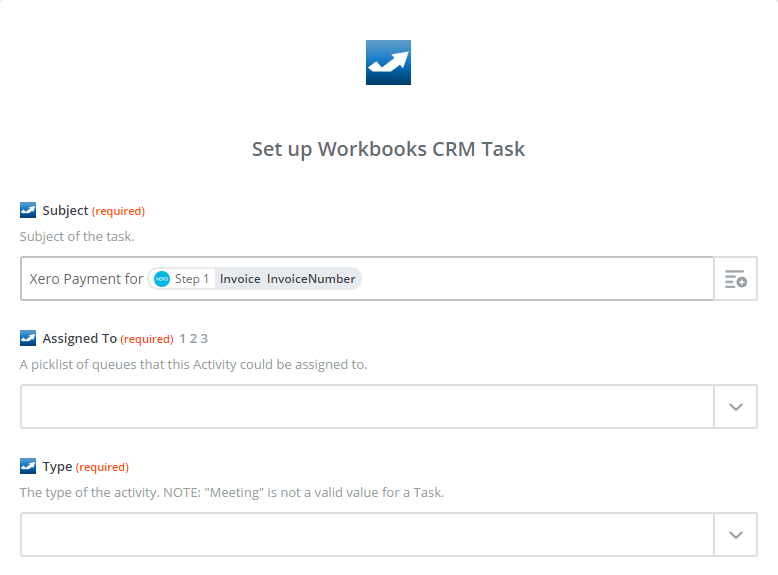
- Subject => “Xero Payment for {Invoice Number}”
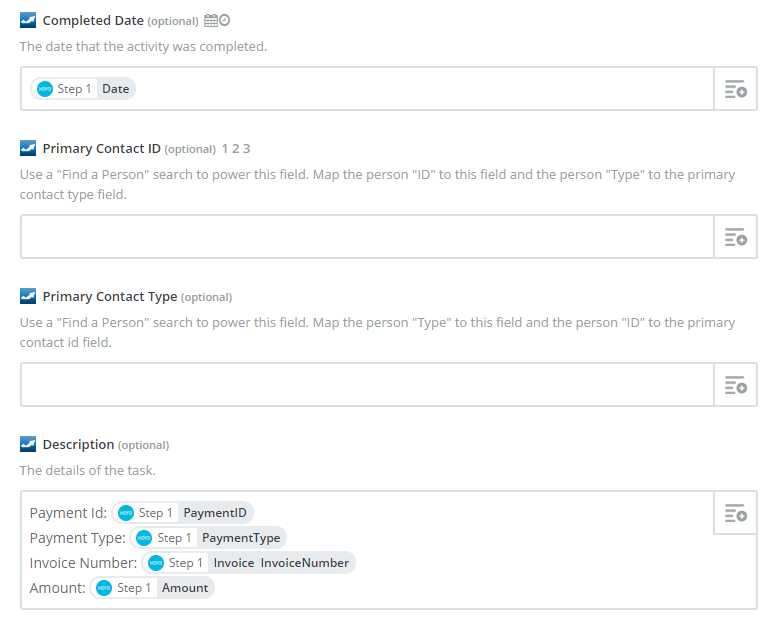
- Completed Date => Date
- Priority => “Medium”
- Description => Payment Id, Payment Type, Invoice Number, Amount
There are also some required fields that need to be completed:
- Assigned To – you can assign all the Tasks to one User, or put them on a Queue.
- Type – for example ‘To-do’, or you could create a new Type in Workbooks e.g. ‘Invoice Payment’.
- Status – for example ‘New’ or ‘Complete’.


If you would like to relate this Task to the relevant Customer, you must set the Primary Contact, which requires you to know the Id of the relevant Workbooks Person. This will require you to add a ‘Find or Create’ step, where you can use the Invoice Contact Email Address to search for the correct Person record, or create one if it is not found. Then you can set the Primary Contact Id to be the ‘Id’ from Step 2, and Primary Contact Type to be the ‘Type’ from Step 2. Linking the Task to the Person will also link it to their Employer.
Linking the Task to the Invoice
If you want to link the Task to the Invoice via this Zap, you will need to set up a few things first.
- You must be storing the Id or the corresponding Workbooks Invoice on your Xero Invoice. We would suggest that you use our ‘Copy new posted invoices from Workbooks CRM to Xero‘ Zap template to set up an initial Zap which sends your Workbooks Invoices to Zapier, and include a mapping of the Workbooks Invoice Id to the Xero Invoice Reference field.
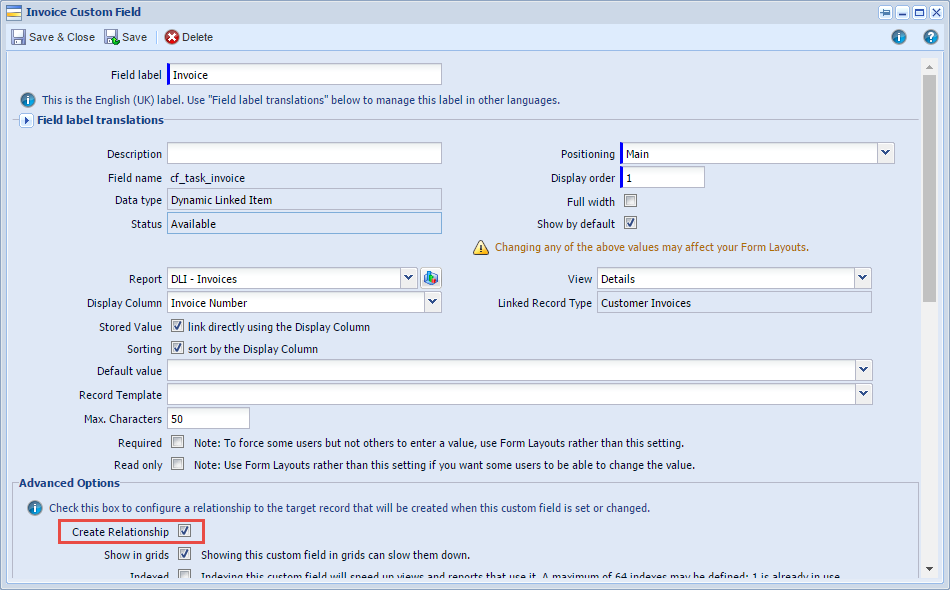
- Then create a Dynamic Linked Item (DLI) field on the Task to store the Id of the Invoice and to create the relationship. It should use a report that simply contains all Invoices, with columns for the Invoice Id and Invoice Object Reference (Invoice Number), and you should tick the ‘Create Relationship’ box.

- You can now use the ‘Create tasks in Workbooks CRM when payments have been received in Xero’ template to set up the Zap, and the DLI will be available when adding the mappings in the last step of the Zap. You must map the Workbooks Invoice Id into the field.
- If an invalid value is provided when creating the Task, i.e. if you were to provide no value or to provide the Object Reference rather than the Id, then the Task will still be created, but the Invoice DLI will be left blank. We would therefore suggest that you map the Invoice Number or name into the Description field of the Task to make it easy to identify when manually linking the Task.