





Synchronizing with the Mail Sync Add-in
The Mail Sync Add-in gives you more control over how records sync between Workbooks and Outlook. It runs alongside Mail Sync and sits as a sidebar in Outlook and Gmail. The Add-in connects directly to Workbooks which means you can create and update records without leaving your email client.
Note
The Add-in free and available to all Users who have a Mail Sync extension allocated to them.
The Add-in gives you the ability to complete the following without leaving your email client:
- See all Workbooks records related to the contacts of an email
- Link emails to the Opportunities, Cases and other records they relate to
- Create and Update People, Leads, Opportunities and other records using detail pulled from the body of the email
- Relate Meetings to Workbooks records and invite Workbooks Scribe AI
Meaning Users won’t need to jump between the two systems to ensure Workbooks stays up to date. The full history can be captured on the record at the click of a button so everyone can stay up-to-date with the latest information. Not just the User receiving the email.
The rest of this page covers:
Emails
When you open an email in Outlook, the Add-in looks up everyone in the To and CC fields. It uses their email addresses to identify any Person or Sales Lead in Workbooks, along with the details held on that record. If it can’t find anyone, you can create a new Person or Sales Lead directly from the Add-in and link the email to them.
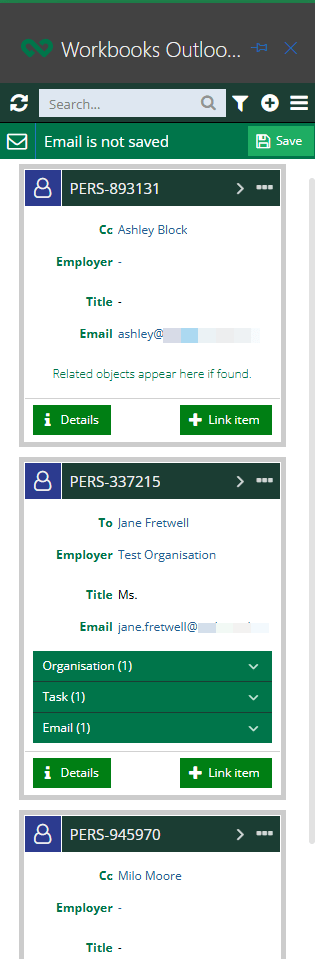
If the email hasn’t been synced yet, the banner at the top of the Add-in says Email is not saved.
Clicking the ‘Save’ button will change the banner to ‘Email is saved’, with the Save icon replaced by a Details button. The email shows up in Workbooks right away, attached to all the email recipients’ records.
Note
You won't see emails from people on your own domain, so your colleagues won't appear in the Add-in even if they're already in Workbooks.
Relating emails to specific records with the Mail Sync Add-In
If an email relates to something specific like an Opportunity or a Case, you can link directly to the record. Once linked, the record appears in the sidebar so you can open it in Workbooks and take a look. This can save lots of time searching between two systems, and it keeps the email easy to find no matter whose mailbox it landed in.
To link an email, find the record using the Add-in’s search bar.
Tip
Use the filter (the funnel icon) to search the specific record type. This helps the Add-in complete the search much faster and provide more accurate results.
Results appear in the sidebar, with a summary at the bottom of the screen. Use the Link Item button on the record’s card to make the link.
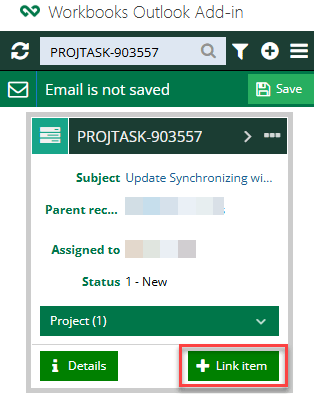
Once the Email has been linked to the record, the ‘Link Item’ button will change to ‘Unlink’ allowing you to undo it, whenever you need to. The email will be sitting on the record in Workbooks, ready to review.
Contacts
Managing Contacts
One of the key benefits of the Add-in, is using Outlook or Gmail data to create contacts that show up in Workbooks immediately.
As mentioned earlier in this article, the Add-in checks all your Workbooks People and Sales Leads, to identify any with a matching email address, and displays them in the Add-in sidebar. If more than one record contains an email address, you’ll get a Contact Card for each.
Each card also has buttons at the top to search Facebook or LinkedIn. They’ll search that site for the name saved against the card, so you can decide whether to connect.
Creating Contacts
Whenever you send or receive an email, you’ll see a Contact Card for every recipient, giving you a quick snapshot of what Workbooks holds on them.
If the Add-in can’t match an email address, you’ll get an empty card titled Not found in Workbooks. Anyone with the Add-in can turn that into a Person or Sales Lead using the buttons at the bottom of the card.
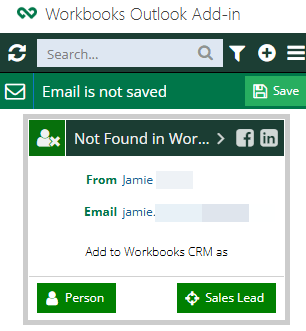
Either button opens a form where you can fill in the contact’s details. Select Create and the record appears in Workbooks straight away. The Add-in refreshes to show the new Contact Card, fully populated.
Updating Contacts
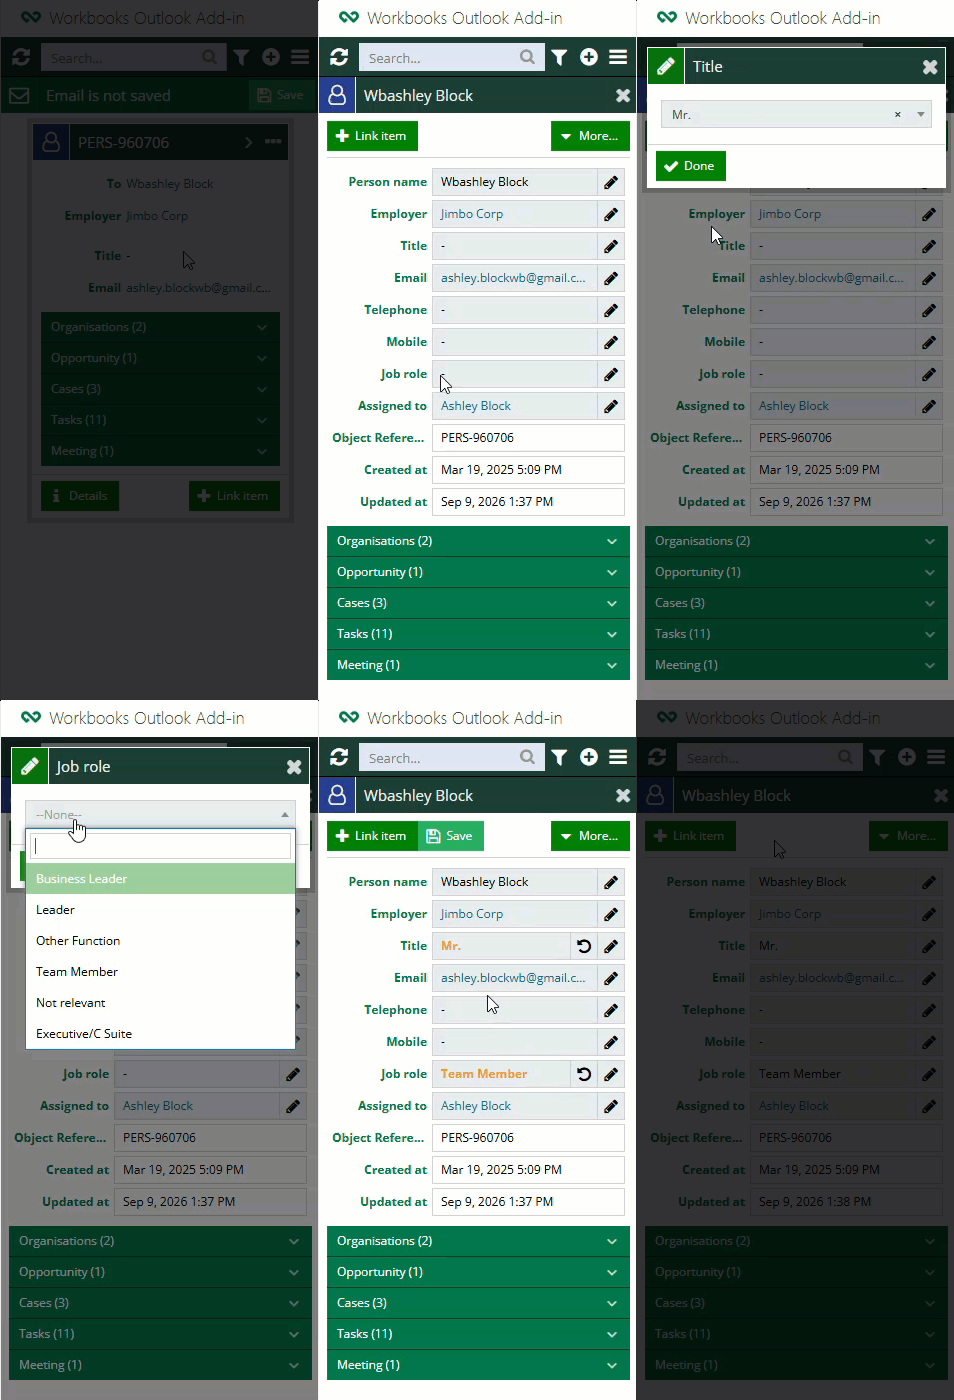
Contact information syncs both ways. To edit a Contact Card in the Add-in, select the contact’s name or the Details button.
You’ll see everything held in the fields the Add-in uses. Select the pencil icon next to a field to change it, then click Done to save changes.
Anything you’ve edited shows in bold orange text, so you can check your changes before they go to the Person record in Workbooks.
Once saved, the text goes back to normal and the record updates in Workbooks.
Meetings
You can manage meetings from your Outlook or Gmail calendar.
Setting a parent record tells Workbooks the main record a meeting belongs to, like an Opportunity or a Project, so the meeting becomes part of that record’s history. The meeting can still be linked to other records at the same time, and you can change the parent later without losing the original connection.
If you’ve got Workbooks AI, you can also invite Scribe AI to a meeting from the Add-in as you create or update it, rather than setting Scribe up separately.
For the full detail, including how to spot meetings with Scribe invited and how to cancel it, see Managing meetings with the Mail Sync Add-in.
Creating new Records
You can create new records through the Add-in, and it’ll pull details from the email body to save you typing.
Use the plus icon at the top of the Add-in (Next to the funnel icon) to see the record types available to create.
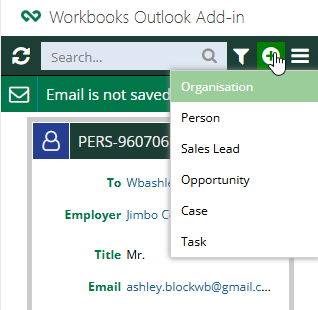
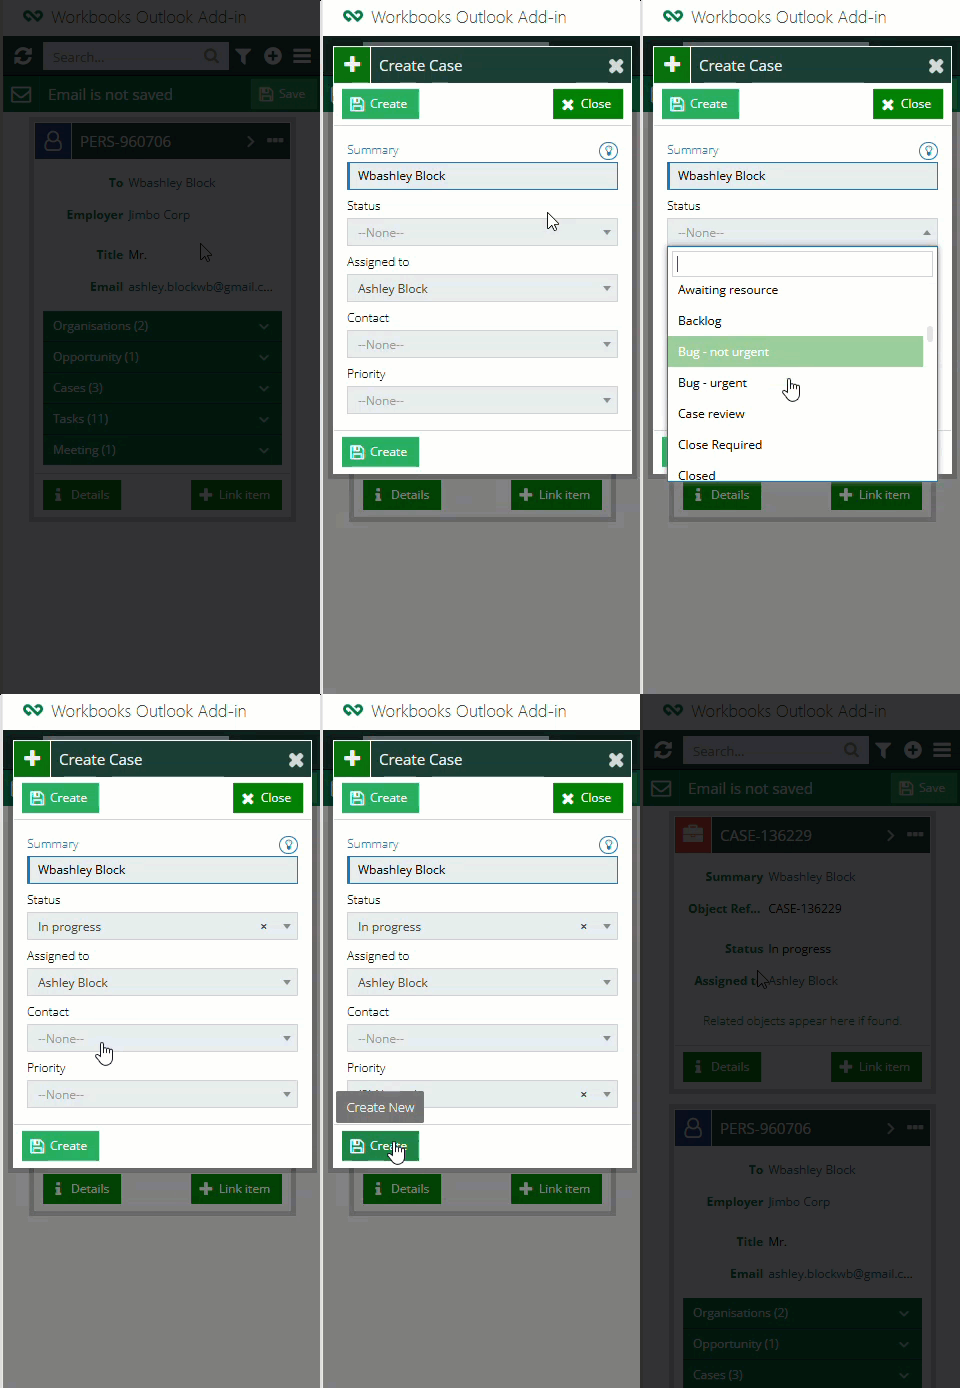
Selecting a Record Type will open a blank record within the Add-in where you can enter the details as required, some fields such as the Assigned to will automatically be populated by your username.
Just like in Workbooks, different record types need different fields. Required ones have a red outline and a note telling you so. When you’re done populating required fields, the Create button at the bottom becomes available and creates the record in Workbooks.