- Welcome to the Knowledge Base
- Introduction
- Training
- Getting Started
- Preferences
- Activities
- Cases
- Forecasts & Quotas
- Importing Data
- Leads
-
Marketing
- Introduction to Marketing
- Marketing Campaigns
- Mailing Lists
- Products
- Mailshots
- Upload Library
- Templates
- Event Management
- Compliance Records
-
Spotler Integration
- What is Spotler?
- Navigating your Spotler homepage
- GatorMail
-
GatorLeads / Web Insights
- Tracking Code
- Setting up the Plugin
- Viewing Web Insights Data on your Form Layouts
- Domain Names and Online Activities
- Reporting incorrect Leads created through Web Insights
- Reporting on Web Insights data
- Using UTM Values
- Why aren’t Online Activities being created in the database?
- Why is GatorLeads recording online activities in a foreign language?
- GatorSurvey
- GatorWorkflow
- GatorPopup
- Opportunities
-
Integrations
- Mapping
- Electronic Signing Tools
- Creditsafe Integration
-
Zapier
- Introduction to Zapier
- Available Triggers and Actions
- Linking your Workbooks Account to Zapier
-
Setting up Zaps
- Posted Invoices to Xero Invoices
- Xero payments to Workbooks Tasks
- New Case to Google Drive folder
- New Case to Basecamp Project
- New Workbooks Case to JIRA Ticket
- Jira Issue to new Case
- 123FormBuilder Form Entry to Case
- Eventbrite Attendee to Sales Lead and Task
- Facebook Ad Leads to Sales Leads
- Wufoo Form Entry to Sales Lead
- Posted Credit Note to Task
- QuickBooks Online
- Survey Monkey responses to Tasks
- Multistep Zaps
-
Email Integrations
- Email Dropbox
- Workbooks Exchange Server Sync
- Workbooks Outlook Connector
- RevenueGrid Intelligence and Engage
-
Event & Webinar Integration Tools
- GoToWebinar
- ON24
- Microsoft Office
-
Outreach
- Installation
- Outreach Authentication
- Sync People to Outreach Prospects
- Sync Organisations to Outreach Accounts
- Sync Workbooks Opportunities to Outreach
- Sync Tasks/Activities from Workbooks to Outreach
- Sync Outreach Sequences to Workbooks
- Sync Outreach Sequence States to Workbooks
- Sync Outreach Sequence Step Numbers to Workbooks
- Sync Prospects/Accounts/Opportunities from Outreach to Workbooks
- Sync Outreach Tasks/Calls/Meetings to Workbooks
- Scribe/Workbooks Connector
- RingCentral
- Auditing
- Comments
- People & Organisations
- Projects
-
Reporting
- Introduction to Reporting
- Using Reports
- Charts
- Exporting Reports
- Advanced Reporting
- Report Snapshots
- Dashboards
-
Transaction Documents
-
Introduction to Transaction Documents
- Displaying & Adding Transaction Documents
- Copying Transaction Documents
- Transaction Documents Fields Help
- Transaction Documents Line Items Help
- Printing & Sending Transaction Documents
- Managing Transaction Document Currencies
- Managing Transaction Document Statuses
- Setting a Blank Default Currency on Transaction Documents
- Credit Notes
- Customer Orders
- Invoices
- Quotations
- Supplier Orders
- Contract Management
- Sagelink
-
Introduction to Transaction Documents
- Auditing
-
Configuration
- Introduction to System Administration
- Users & Security
- Preferences
- Database
- Accounting
- Email & Integration
-
Customisation
- Creating & Modifying Picklists
- Theme
-
Record Types
- Creating Custom Fields
- Report-based Custom Fields
- Linked Fields & Reference Fields
- Record Templates
- Form Layouts
- Customising relationships between parties
- Opportunity Stages
- Custom Records
- Automation
- PDF Configuration
- Contact Support
- Releases & Roadmap
DocuSign Example - Creating a Template for People
DocuSign can be used to send a document for signature from a Person record, this may be used to sign a non disclosure agreement or confirm that they will adhere to an internal policy. These are documents where the content on the page will remain constant and only requires the signature and/or date signed to confirm acceptance.
This example will take you through the process of how to set up a DocuSign Template that can be sent from a Person and sync fields from Workbooks to DocuSign and feed it back into Workbooks on signing.
Note: It is also possible to send a Workbooks PDF from a Person, however this would require the creation of a custom PDF template.
To create a New Template you will first need to login to DocuSign. Once logged in from the New menu select Create Template.

On the new Template, you will need to give it an appropriate Name & Description, then upload the file that will be sent out for Signature.
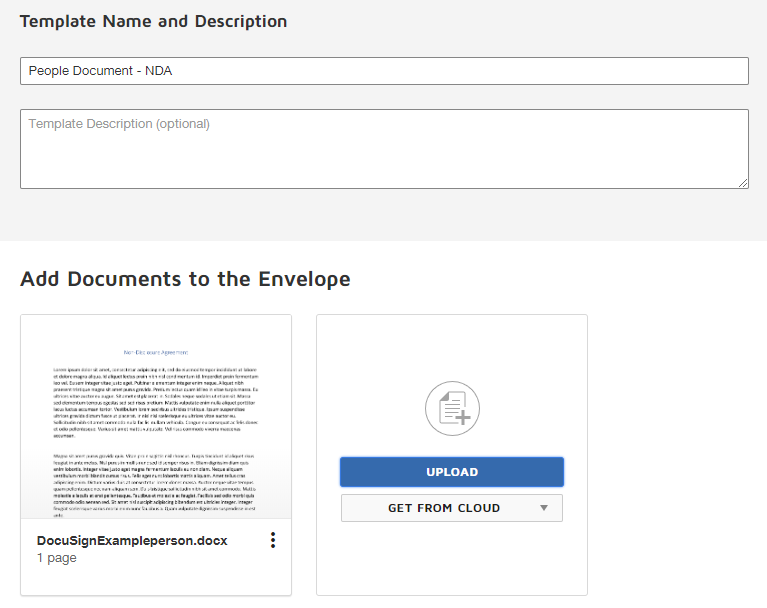
Then add a recipient with a “Signer 1” relationship, once this is complete save & close the Template, the signature fields will need to be added once the integration has been configured in Workbooks.

You will need to create a New Document from the DocuSign integration Menu, this is accessed from Start > Configuration > Email & Integration > DocuSign and select New Document and Continue.
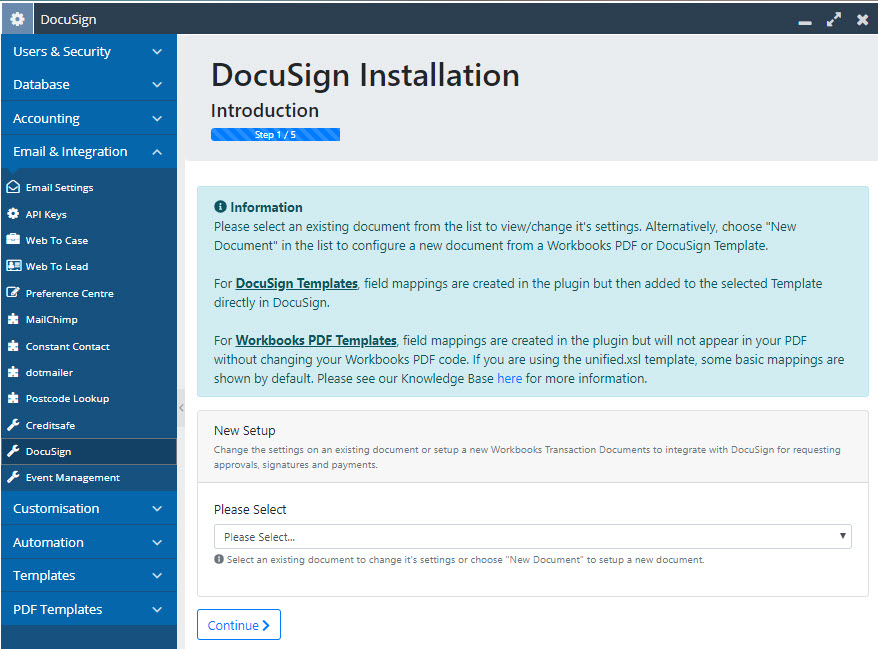
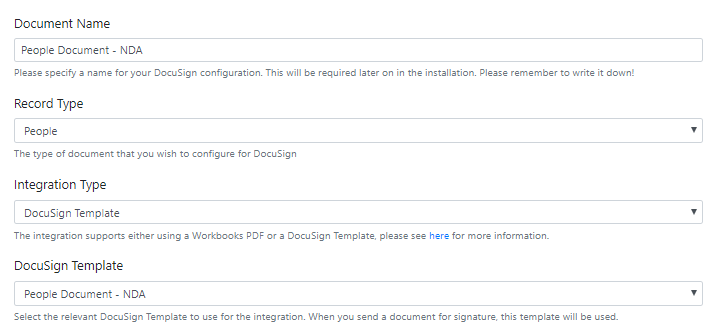
Configure the document to your specifications, giving it an appropriate name and selecting People as the Record Type.
This example is using a DocuSign Template so for Integration Type, select DocuSign Template. This will show a new option where you should select the DocuSign Template that you want to use. Select the Template that was configured in Stage 1.
We recommend that you set up your template so that you receive all DocuSign Notifications enabling you to be kept fully updated on all customer actions. We’d also recommend that you turn on the Certificate of Completion setting.

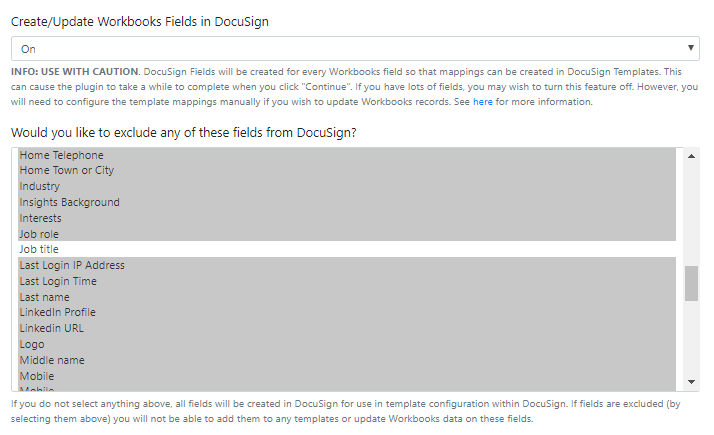
In this example we will configure the Template so that Workbooks Fields will be synced to DocuSign, these Fields can then be updated in Workbooks when the Document is signed by the recipient.
We will only map the Job Title field to DocuSign in this instance, so you will need to select all (Ctrl/Cmd + A) of the other fields on People and then deselect (Ctrl/Cmd + left click) Job Title.
Note: The Process that syncs Fields to DocuSign has a limit of 100 Fields an hour. It runs hourly to prevent the integration from hitting any DocuSign API limits. If you are syncing a lot of Fields to DocuSign this may take some time and may need to be left overnight.
We always recommend that you turn on the Certificate of Completion setting so that you can see a full audit of what happened to document once it is signed. If you have the Workbooks Audit module, you will also be able to see some of this detail in the Summary tab on the Workbooks record.

As the Signer for this document will be the Person, the Signer/ CC Recipient Setup will not contain any information. A relationship is not used for a Person document, the Person simply needs an email address stored on their record in the Email Address field.

For this example the Interactive Send Mode is turned on so that the Draft Document can be reviewed before it is sent out, the rest of the settings can be turned off.
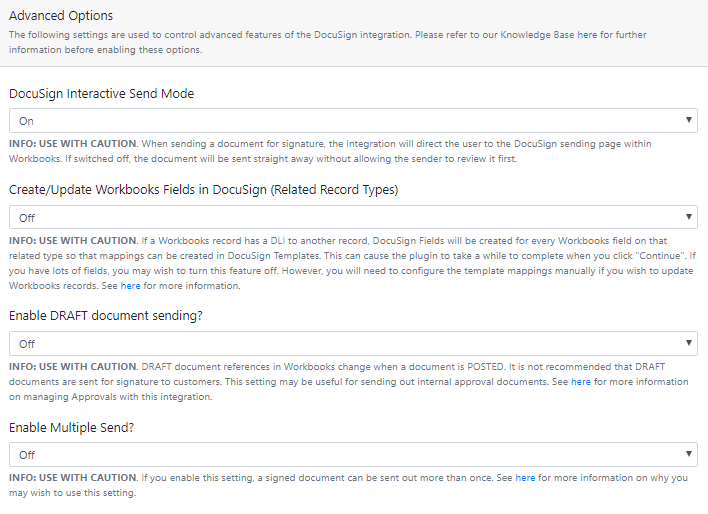
Once this stage has been completed the Template is ready to be setup for use.

Note: Keep this window open as you will need to refer back to the Parameters set here when setting up the Button Process.
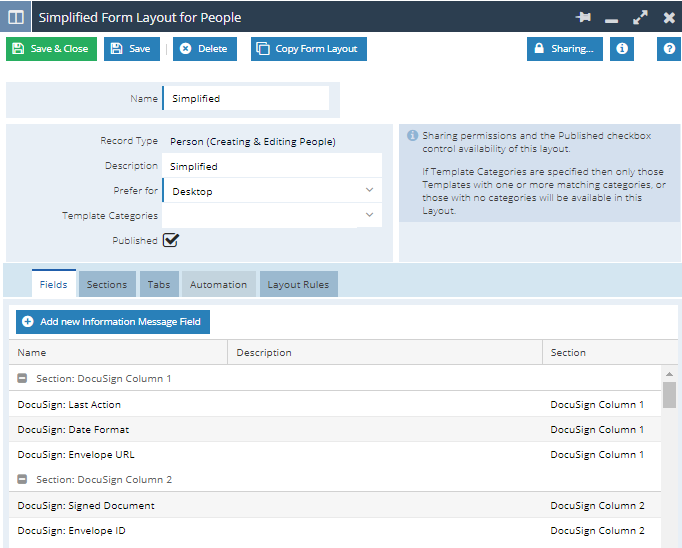
Once the Template has been installed you will need to configure any Form Layouts with the Docusign Fields and the Button Process in order to generate the Document Envelope for sending.
To configure this you will need to go to Start > Configuration > Customisation > Record Types > People. On the Form Layouts Tab select the Form Layout that you want to generate the DocuSign Envelope from. Once you have opened the Form Layout go to the Automation Tab and select New Process Button.
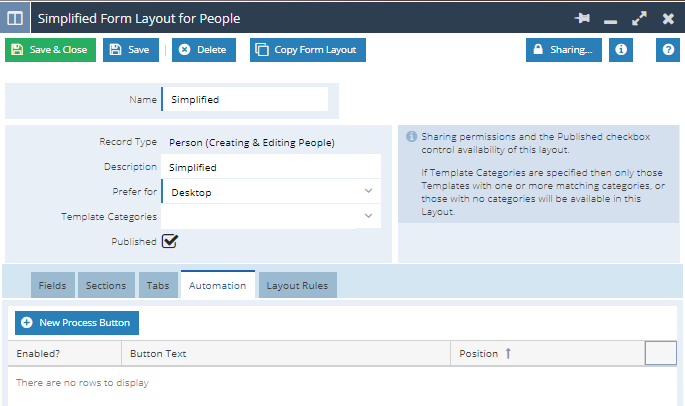
This will generate a new dialogue box that will allow you to configure your Button Process. Set the following details to configure a new Process Button:
- Button Text: You will need to ensure that your Button Text identifies the correct Document, especially if you have different Documents that will be sent to people.
- Script Location: Select Script Library
- Script: Select DocuSign Integration
- Enabled: Ensure the Enable checkbox is checked
- Run as: Set as the appropriate User, for this example select the Current User so that they receive notifications for the Document
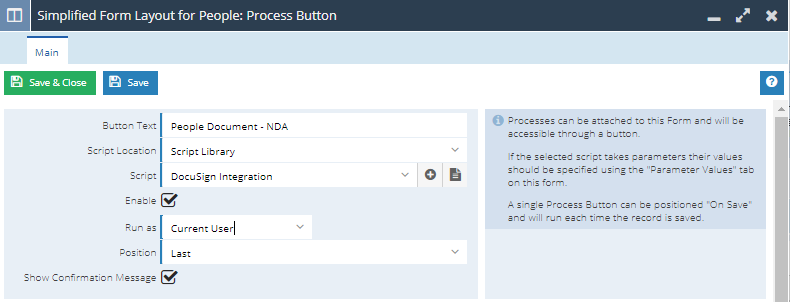
Once this page has been configured press Save and then go to the Parameter Values Tab.
You will need to then add in the values for the document_name and mode parameters, these were defined on the completion of the Template setup.
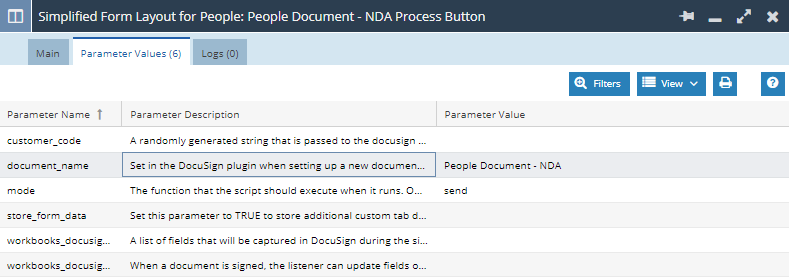
Once the Button Process has been configured, return to the Fields tab of the Form Layout and ensure that your Form Layouts are configured to show the required DocuSign Fields. Once this is complete you are ready to finalise your DocuSign Template.
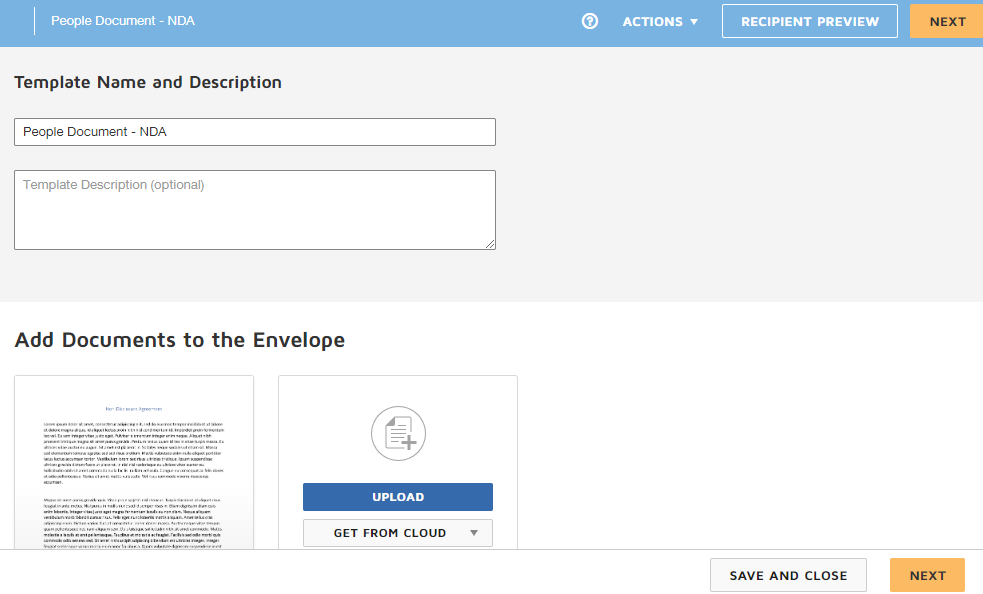
Return to DocuSign to configure any fields on the document, such as a Signature or the recipient’s name. In DocuSign, select the Templates option and use the dropdown on the Use button to select the Edit option.

Here you can review your initial template setup and make any final changes to the Template. Once you are happy with the changes select the Next button to start configuring the Fields.
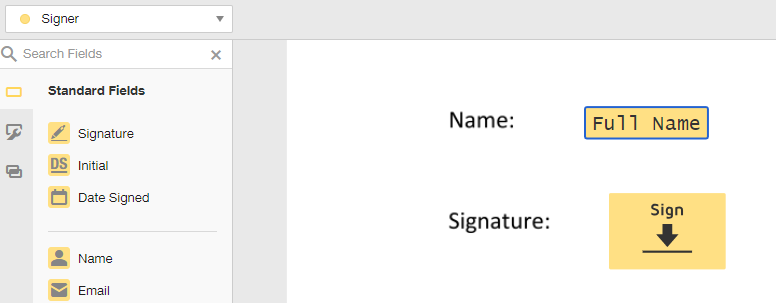
Fields such as Signature and Name can be found in the Standard Fields menu and these can be placed on your document where needed. The Full Name will be automatically populated when opened by the recipient, displaying what is in the Person Name field within Workbooks.
To set up any additional Fields that have been synced over from Workbooks, you can either use the search bar to find the Field, or look through the Custom Field Menu. In this example, Job Title was the only field synced across. Once the Signature is submitted whatever value was in this box will update the relevant Field in Workbooks.

Once these Fields have been configured the Document is ready to send.
Once you have set up the Form Layout with a Button Process you will be able to generate a new document via DocuSign. Before sending the document you will need to ensure that the Person has a valid email address or the Process will fail.

Once you have checked this, click Run Process and select the appropriate Process to run.
The Process will then switch to a DocuSign tab (only if you left Interactive Send set to “On” during the document setup) allowing you to review the details on the document and see how it will be presented to the Customer.
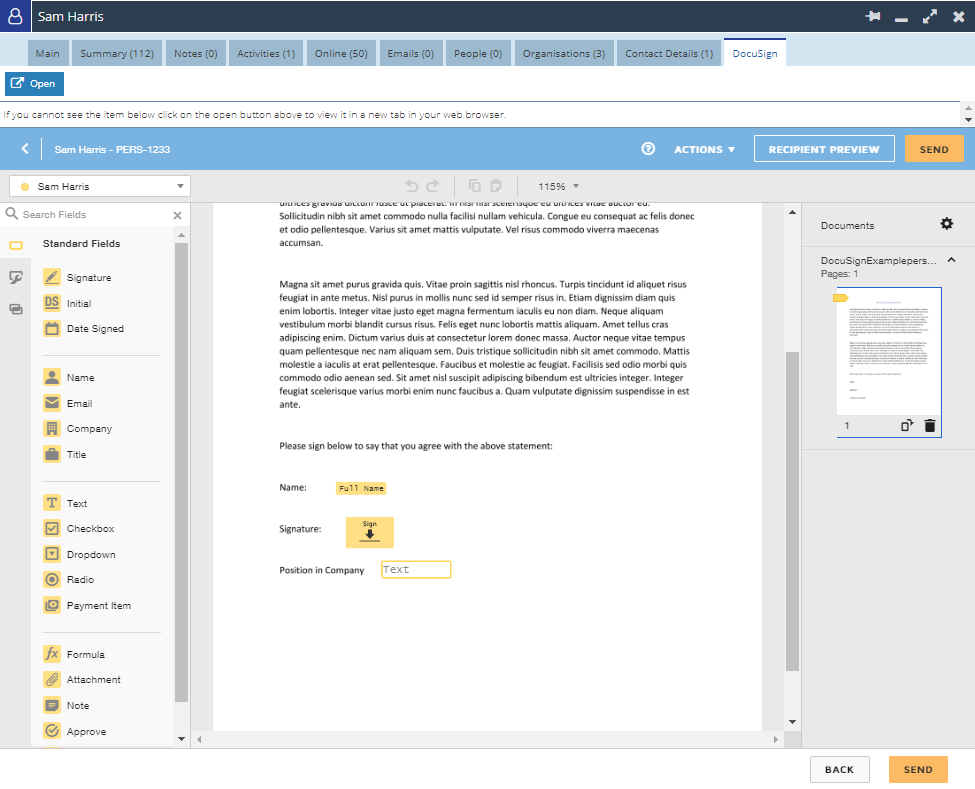
If you are happy with the document you can then use the Send Button - DocuSign will then send the generated preview as a live email to your Customer for signature.
You can review the status of the document at any time from the Main tab of the record in Workbooks. The DocuSign: Document Status Field will provide you with a live update as to where the document is with the recipient and the DocuSign: Last Action will tell you when the Last Action occurred.
Note: We have created a Forum Post that provides a step-by-step guide to building a Report that allows you to review DocuSign Templates at any stage.
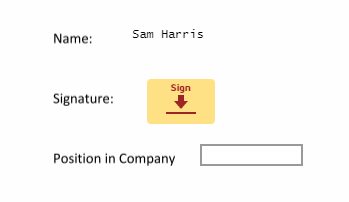
Upon receiving the Document the Signer will see their name pre-populated, a Sign Here button as well as Fields that need to be filled out. If fields have been configured to be required they will be unable to finish the Document without filling these in.
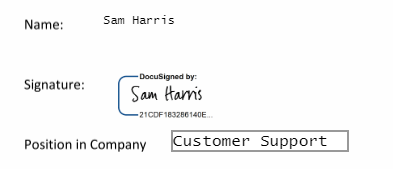
Once the document has been signed you will receive a Notification in line with your Workbooks Notification settings. The DocuSign Document Status Field will be updated to Document Signed and you will be able to review the signed document from the DocuSign Signed Document Field.

For this example the Position in Company Field has updated the Job Title Field in Workbooks with “Customer Support” which was what was submitted on signing.
![]()
Additionally the Certificate of Completion will be available for you to review from the Files tab, providing that this has been configured on your Form Layout.


