How to save views, add reports as views, set a default view, share a view and manage saved views.

A quick way to create a new layout is to copy an existing one and make your required amendments.
Remember: you need to save any changes on the form creation landing page AND the window for the field you're changing before the changes take effect!
By investing some time in planning how you want forms to appear, you can create a completely unique set of Workbooks records and it's worth experimenting to test the effects of modifying existing layouts.
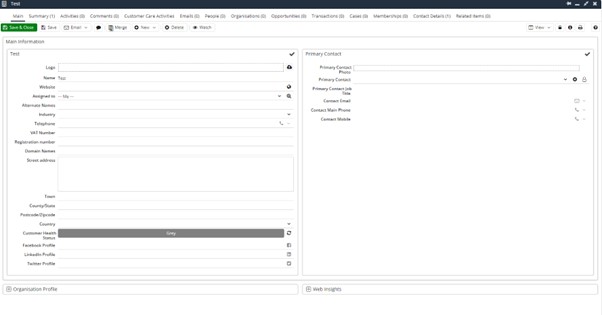
The screenshot below shows the default layout of an Organisation record. As part of the customisation, you are able to change where the fields are located and also group them together in ‘Sections’.
Before starting to customise a form we recommend that you create any Picklists and Custom Fields that you want to use on the form. You can always add new ones later, if required.
Click here for more information on how to create Custom Fields.
To start your customisation click Start > Configuration > Customisation > Record Types and select Organisations from the grid on the right. Within the Form Layouts tab, click New Form Layout.

Give the layout a Name and Description.
NOTE: Do not include apostrophes in the naming of your Form Layouts. This will cause problems with the rendering of your Workbooks User Interface.
Then you can customise the:
In addition, you can add a Process Button to the layout within the Automation tab and within the Layout Rules tab you can apply filters that control which records adopt the layout you're creating.
You can leave the Sections as they are, edit or hide them and/or add new Sections.
To create new Sections, open the Sections tab and click Add new Section. You will then be able to name your new section (Section Name), choose the number of columns it will have (No. of Columns) and determine where the New Section will be positioned.
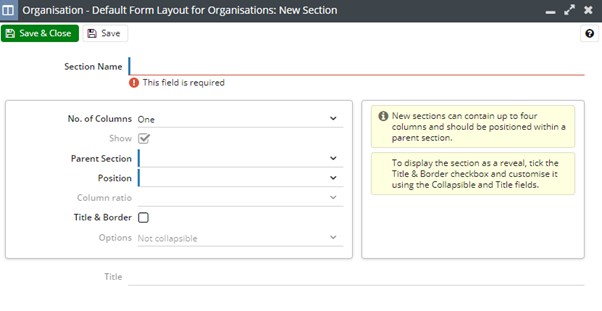
The ‘Parent Section’ determines if your next section will be on the Main Form or will be a sub-section of one that has already been created. The Position lets you choose where in the Parent Section this will be placed.
The ‘Title & Border’ checkbox indicated if you would like a Border and a Title for your new section. If you check this, you will also be able to determine if this section can be collapsable or not. You can also choose if the section is collapsed when the Record is first opened or if you want the section shown and with the option to collapse it. You can also show it as a Card.
A Card Section shows fields in a summary read-only view. When you expand a Card, the fields will become editable. For more information about Card Views please visit our dedicated page on them here.
If a section is not needed on the Form you are editing though needed on a different Form, you are able to hide it. Open the Section you are wanting to hide and remove the tick from the checkboxes next to Show.
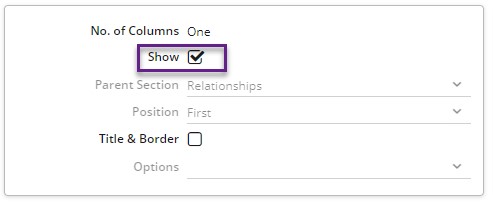
NOTE: At the bottom of the Sections tab you'll see a number of greyed out rows. These are the Sections that have been 'hidden' from this customised form layout by removing the tick from the checkbox next to Show. You can make these sections visible again by opening them and ticking the box next to Show.
All the Fields available for the Record Type you are looking at are listed in the Fields tab including Custom Fields you have created. You can move fields from one Section to another, re-order them within a Section or hide them from view. You can change how a Field behaves by making it mandatory or read-only and enter a default value for it. These changes only apply in the context of the form you're customising. You could create a different customised form where the Field behaves differently.
NOTE: At the bottom of the Fields tab you'll see a number of greyed out rows. These are the fields that have been 'hidden' from this customised form layout by removing the tick from the checkbox next to Show.
You can specify which Tabs appear on the form and the order in which they're displayed. Tabs can also be ‘hidden’ if they are not needed.
NOTE: Be cautious when 'hiding' tabs. For example, if you hide the Notes tab, a User can still click New on the Main tab of an Organisation record and create a Note record. Once they saved it, they wouldn't be able to open it from the Notes tab as that tab has been hidden.
Open the Tabs tab and open the Tab you are wanting. The checkbox next to Show allows you to either show or hide the Tab.